> ## Documentation Index
> Fetch the complete documentation index at: https://moengage-analytics-query-api-docs.mintlify.site/llms.txt
> Use this file to discover all available pages before exploring further.
# Webflow
## Introduction
[Webflow](https://webflow.com/) helps teams collaborate and develop websites. It reduces development time by letting teams develop and design simultaneously. Content teams can edit while design continues, and project managers can easily oversee the process.
## MoEngage and Webflow
With the MoEngage and Webflow integration, you can capture your Webflow landing-page inputs and send personalized, targeted campaigns through MoEngage to drive conversions. With this integration, you can:
* Create or update users in MoEngage when a form is submitted.
* Create events with the details submitted from the form.
## Integration
**Prerequisites**
* Ensure you have access to your Webflow setup and webhooks.
* Ensure you have the site ID for your website page.
### Step 1: Get your MoEngage endpoint
To get a dedicated endpoint for your integration, contact the MoEngage Support team. In your request, specify the common identifier used to link user profiles between MoEngage and the partner platform. For example, this can be the user's email ID or phone number.
### Step 2: Set up the webhook in Webflow
#### Get your site ID
You can access the site ID from your site settings.
1. In the designer, click the **Webflow** icon in the top-left corner and select **Site Settings** from the menu.
2. In Site Settings, scroll down to the **Overview** section to find your Site ID.  #### Create an API key
1. Navigate to **Site** > **Apps and Integration**.
2. Scroll down to the **API access** section.
#### Create an API key
1. Navigate to **Site** > **Apps and Integration**.
2. Scroll down to the **API access** section. 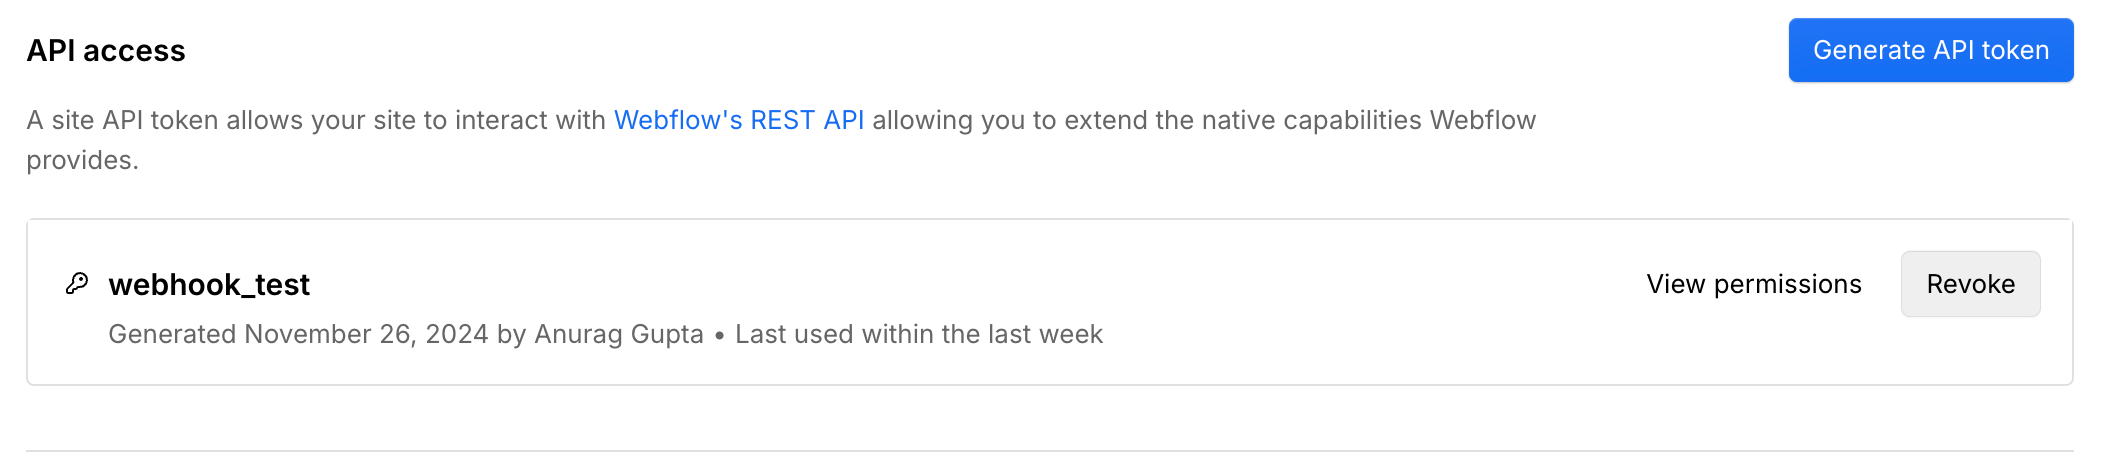 3. Click **Generate Key**.
4. Provide a name for the key and add the relevant permissions.
3. Click **Generate Key**.
4. Provide a name for the key and add the relevant permissions. 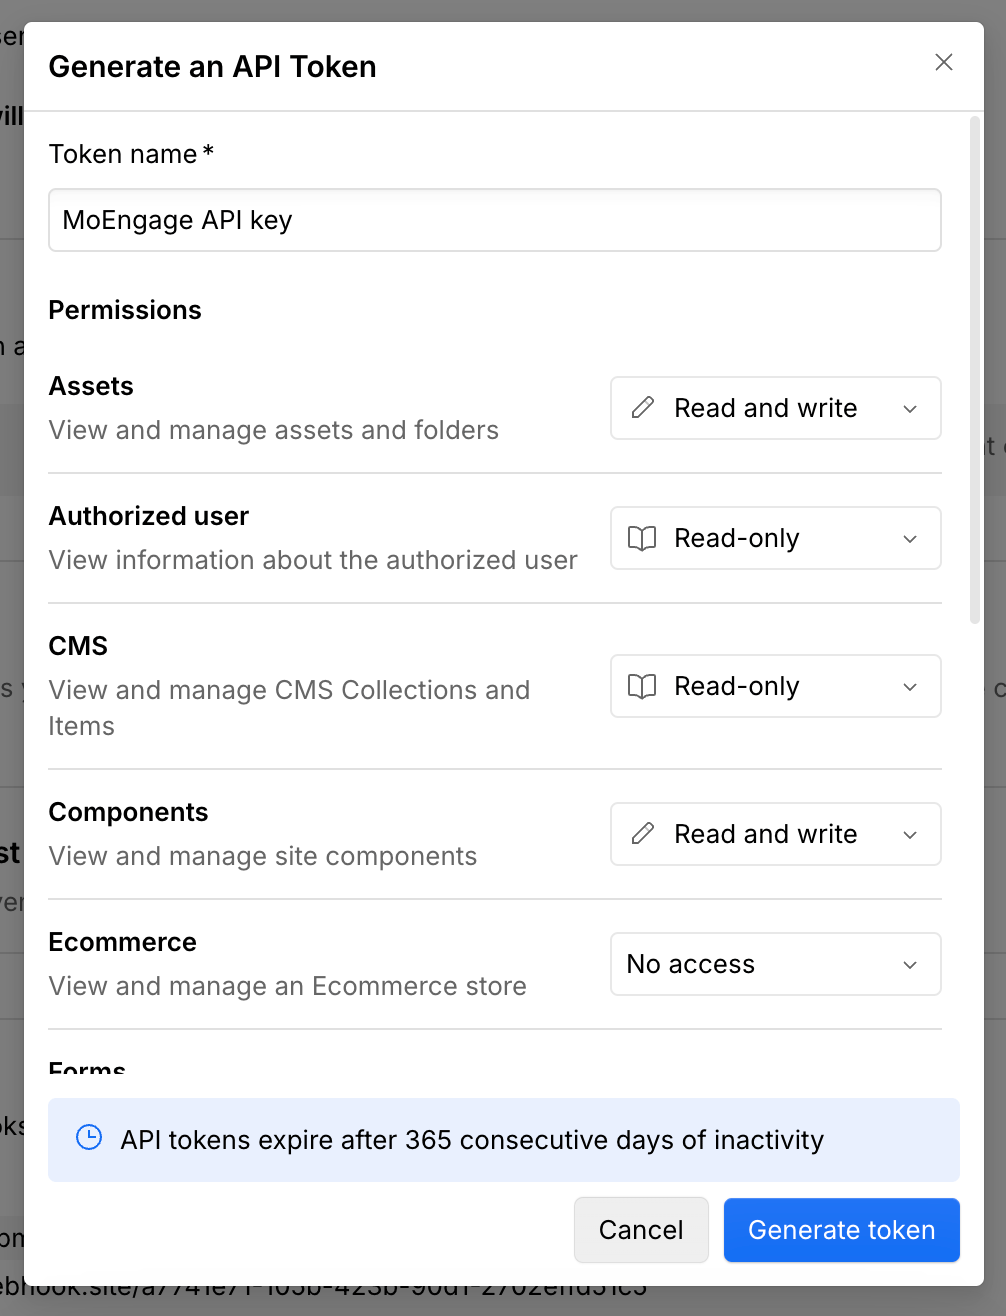 5. Click **Generate Token**.
Copy the token immediately and store it securely. You won't be able to view it again.
#### Create a webhook
Send a `POST` request to the Create Webhook endpoint. In the request, include the `site_id`, `url` (MoEngage endpoint), and `triggerType` of `form_submission`.
You can use the [Webflow Create Webhook API reference](https://developers.webflow.com/data/reference/webhooks/create?playground=%2Fdata%2Freference%2Fwebhooks%2Fcreate) directly, or use the following cURL command:
```bash cURL wrap theme={null}
curl --location 'https://api.webflow.com/v2/sites/6745f3f6b40250a60ab0f815/webhooks' \
--header 'Authorization: Bearer ' \
--header 'Content-Type: application/json' \
--data '{
"triggerType": "form_submission",
"url": ""
}'
```
Replace `` with the token you generated in the previous step, and `` with the dedicated endpoint you received from MoEngage Support.
#### Test the webhook
Once you successfully create the webhook to listen for new form submissions, you can test it by navigating to the form on your site and submitting a response.
### Step 3: View details on MoEngage
Your users and events should start showing up in MoEngage. You can validate them from the user profile. The event name appears as `webflow form submission`. You can now run event-triggered campaigns to your users.
The test submission appears as a user in MoEngage with the `webflow form submission` event tracked.
5. Click **Generate Token**.
Copy the token immediately and store it securely. You won't be able to view it again.
#### Create a webhook
Send a `POST` request to the Create Webhook endpoint. In the request, include the `site_id`, `url` (MoEngage endpoint), and `triggerType` of `form_submission`.
You can use the [Webflow Create Webhook API reference](https://developers.webflow.com/data/reference/webhooks/create?playground=%2Fdata%2Freference%2Fwebhooks%2Fcreate) directly, or use the following cURL command:
```bash cURL wrap theme={null}
curl --location 'https://api.webflow.com/v2/sites/6745f3f6b40250a60ab0f815/webhooks' \
--header 'Authorization: Bearer ' \
--header 'Content-Type: application/json' \
--data '{
"triggerType": "form_submission",
"url": ""
}'
```
Replace `` with the token you generated in the previous step, and `` with the dedicated endpoint you received from MoEngage Support.
#### Test the webhook
Once you successfully create the webhook to listen for new form submissions, you can test it by navigating to the form on your site and submitting a response.
### Step 3: View details on MoEngage
Your users and events should start showing up in MoEngage. You can validate them from the user profile. The event name appears as `webflow form submission`. You can now run event-triggered campaigns to your users.
The test submission appears as a user in MoEngage with the `webflow form submission` event tracked.