> ## Documentation Index
> Fetch the complete documentation index at: https://moengage-analytics-query-api-docs.mintlify.site/llms.txt
> Use this file to discover all available pages before exploring further.
# How to Cross-Sell Study Material Packages to Students
# Introduction
Upselling is the strategy of selling higher-value course packages to prospects or additional services that integrate into their chosen course. This encourages students to complete their qualifications, as they’ll have access to supplementary resources and a better quality educational experience overall. Cross-selling, on the other hand, involves suggesting additional courses that may complement the student's original course. For example, if a student has studied business administration, they might be interested in leadership and management courses.
In this article, we will learn how to upsell or cross-sell courses and study materials to students using MoEngage recommendations.
# Expected Result
Timely nudges of new or different courses which is of the user’s interest would attract user’s attention to browse through the courses/ articles. They would browse more, educate themselves of the new course and indirectly, increase the chances of making a purchase.
* You must capture the category of the user during the onboarding stages of the App, where the user is asked to select their category. The value can be captured on the CTA and passed to User Attribute: Category.
* Events to track the action of a user. To understand how to track events, refer to the [Developer Guide](/developer-guide/introduction).
* Mapping of these tracked events to concerned MoEngage events. For information on mapping custom events to MoEngage events, refer to [Map User Actions Settings](/user-guide/content/recommendations/prerequisites/map-user-actions-settings).
* Settings for one or more channels such as Push, Email, SMS, or WhatsApp.
# Create a Catalog
We can use one of the following recommendations:
* Basic: If you have a specific set of recommendations for each course and want to push those courses, it is advisable to use Basic Recommendations. You can add the recommendations in columns corresponding to each category or product. The catalog would look like the following:  * AI: If you want to use AI Recommendations, the following catalog would be useful. Additionally, we can filter the results based on category.
  # Create a Recommendation
In this section, let us create a recommendation.
1. Navigate to the MoEngage dashboard and select **Content** > **Recommendations** from the left navigation. The Recommendations page is displayed. For more information, refer to [Creating User Action Recommendations](/user-guide/content/recommendations/basic-recommendations/user-actions-model).
2. At the top right corner, click **+ Create recommendation**. This will take you to the first step, "Select recommendation model."
# Create a Recommendation
In this section, let us create a recommendation.
1. Navigate to the MoEngage dashboard and select **Content** > **Recommendations** from the left navigation. The Recommendations page is displayed. For more information, refer to [Creating User Action Recommendations](/user-guide/content/recommendations/basic-recommendations/user-actions-model).
2. At the top right corner, click **+ Create recommendation**. This will take you to the first step, "Select recommendation model." 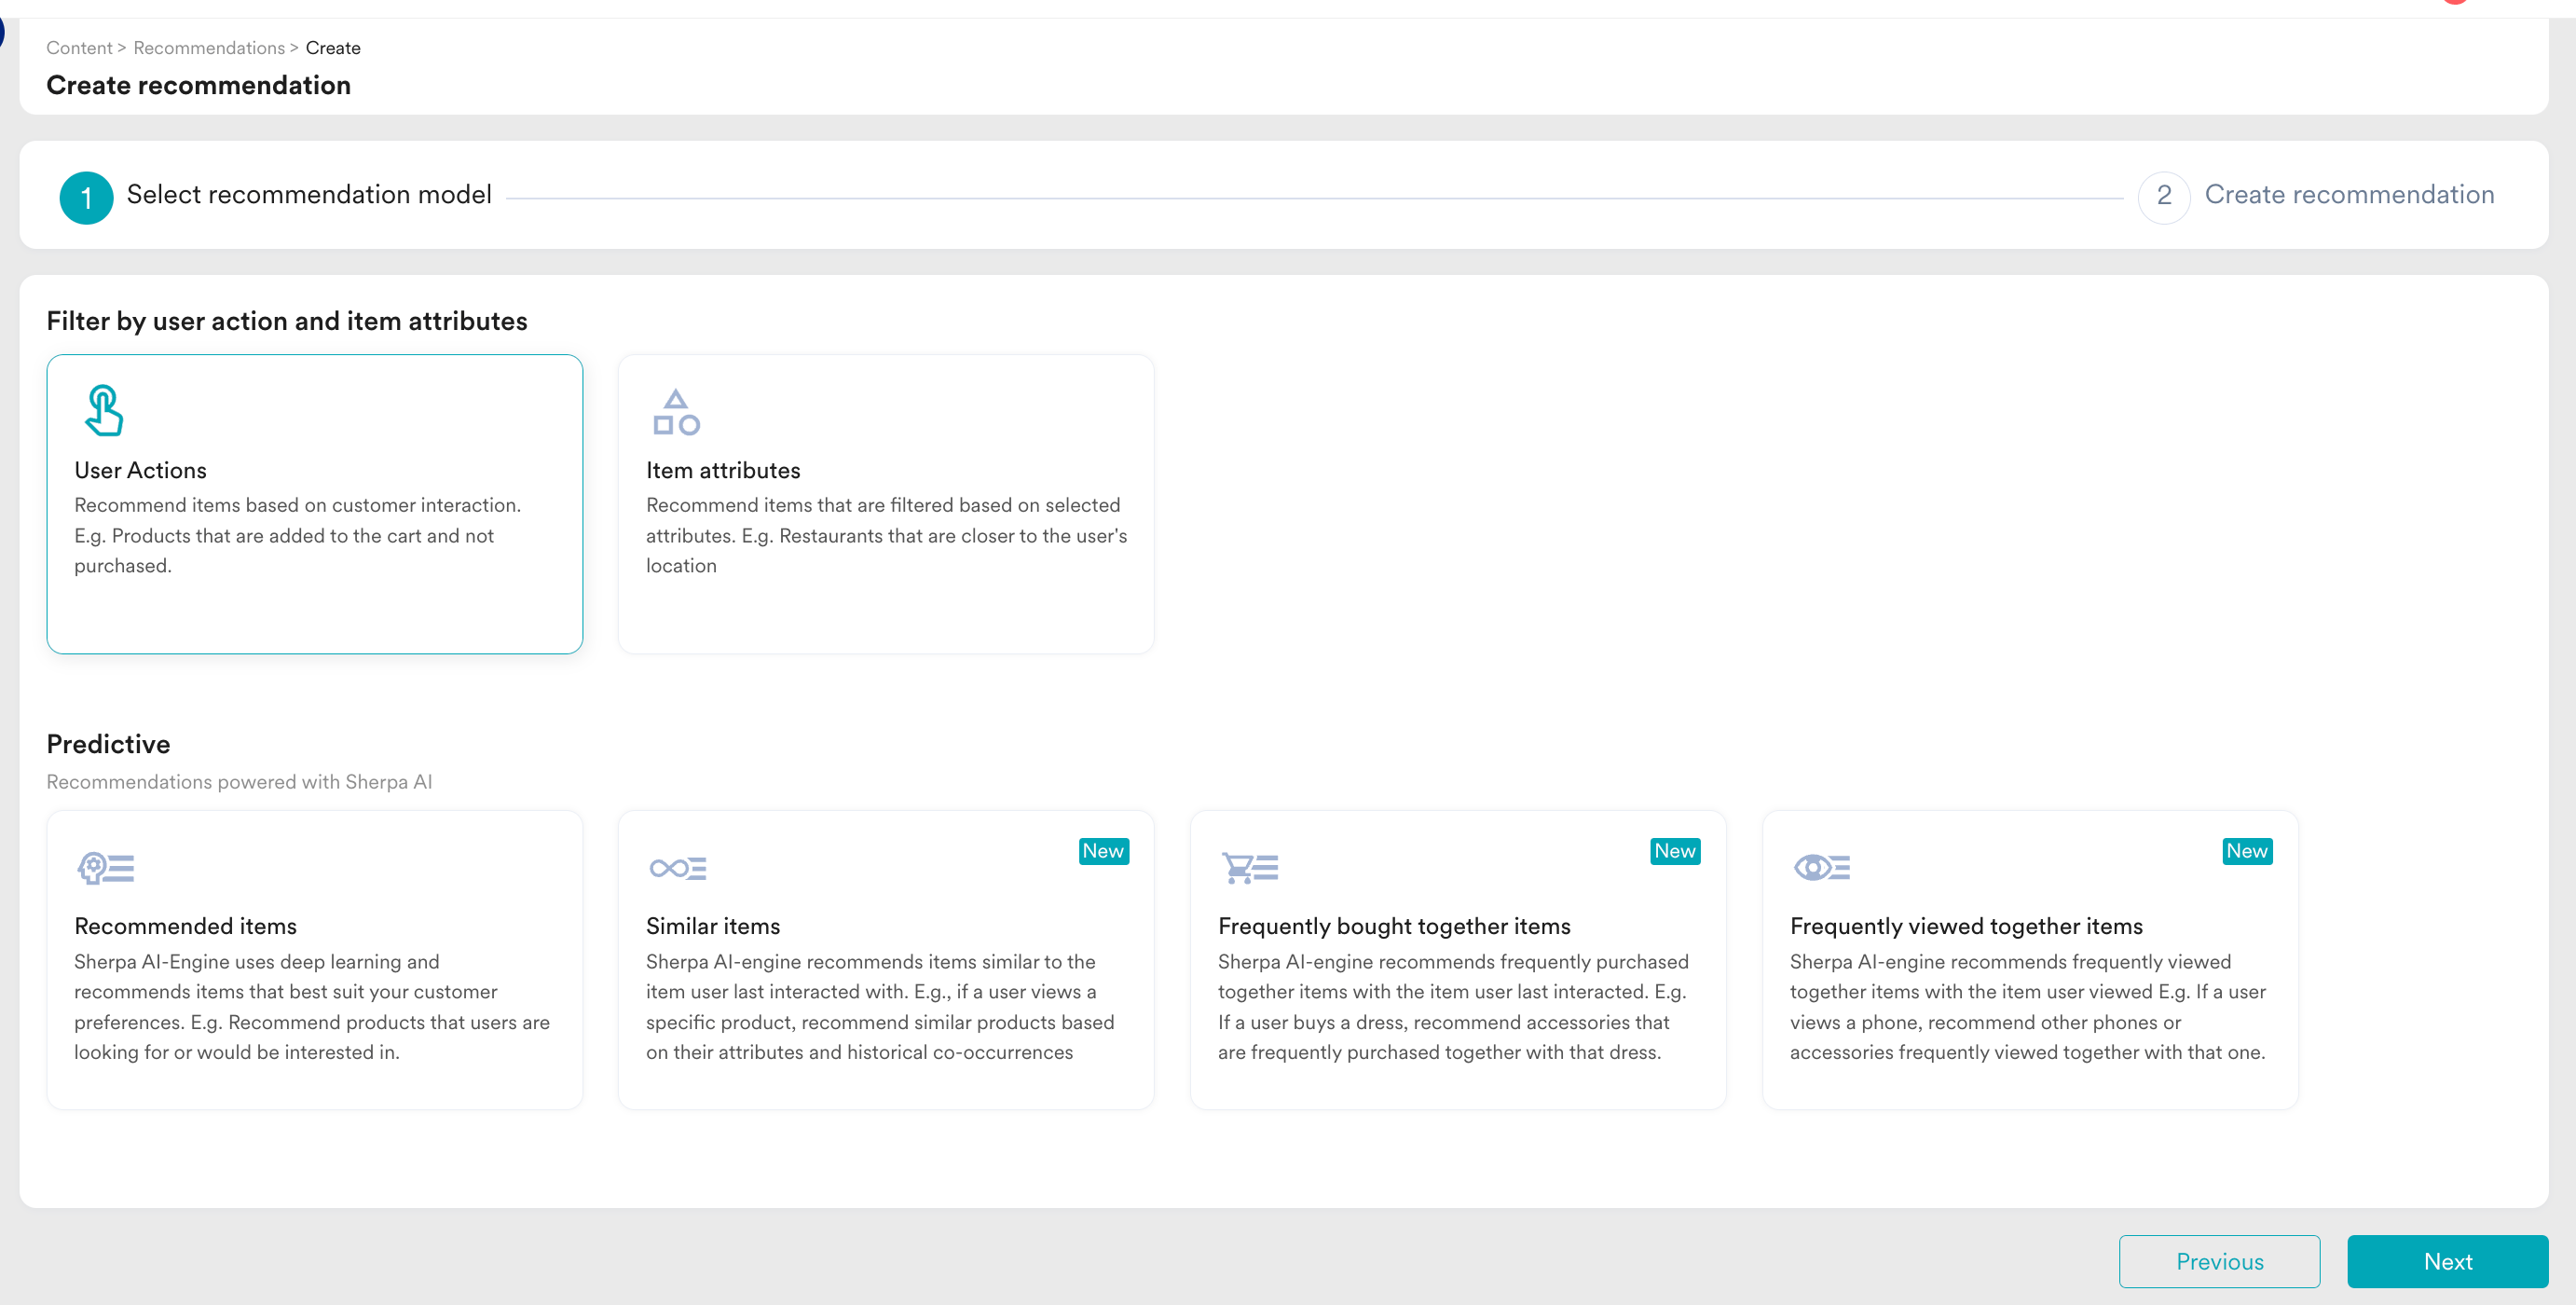 3. Select the **Item attributes** model and click **Next**. It takes you to the second step "Create recommendation." Enter the following details:
1. **Recommendation name**: Enter a name for the recommendation.
2. **Recommendation description**: Enter a description for the recommendation. This description will help you understand the model's aim.
3. **Catalog**: Select the catalog on which the recommendation will be worked.
4. Within Item Attributes, the model should be as follows:
3. Select the **Item attributes** model and click **Next**. It takes you to the second step "Create recommendation." Enter the following details:
1. **Recommendation name**: Enter a name for the recommendation.
2. **Recommendation description**: Enter a description for the recommendation. This description will help you understand the model's aim.
3. **Catalog**: Select the catalog on which the recommendation will be worked.
4. Within Item Attributes, the model should be as follows: 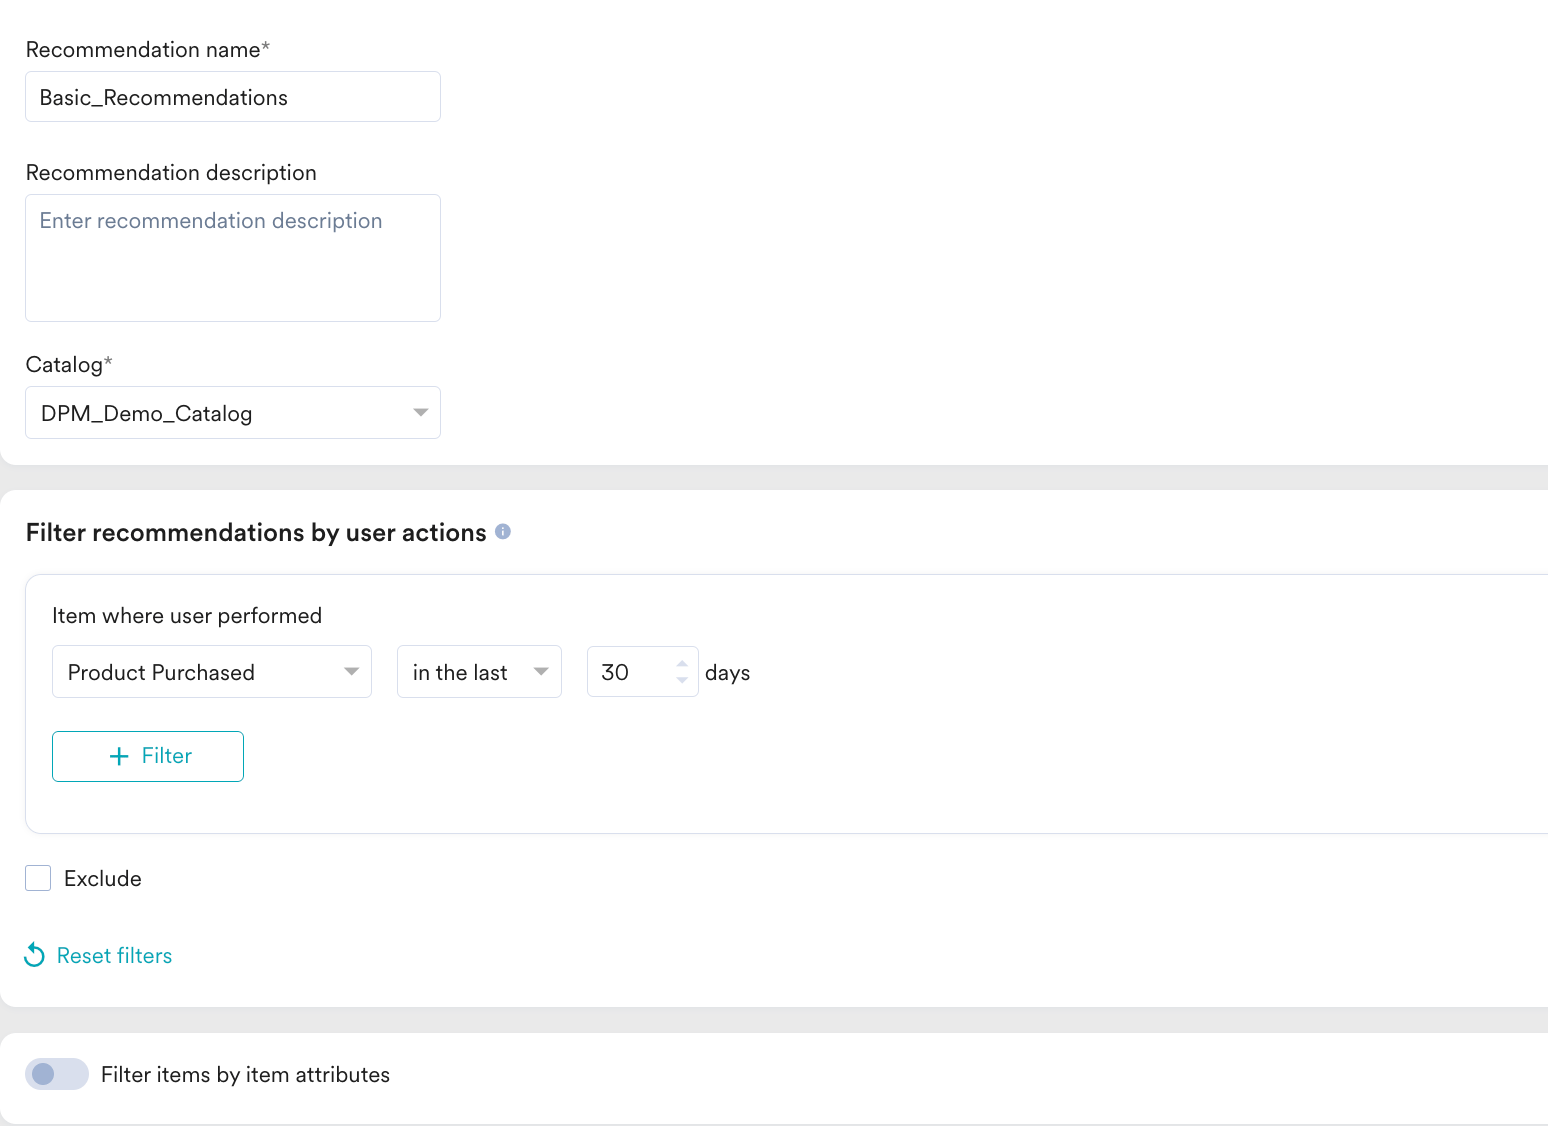 5. If we are using product names, we can filter by the Category.
6. Click **Create** to save the changes and run the model. Its status will be Active on the Recommendations home page.
1. Navigate to the MoEngage dashboard and select **Content** > **Recommendations** from the left navigation. The Recommendations page is displayed. For more information, refer to [Creating User Action Recommendations](/user-guide/content/recommendations/basic-recommendations/user-actions-model).
2. At the top right corner, click **+ Create recommendation**. This will take you to the first step, "Select recommendation model."
3. Select the **Similar items** model and click **Next**. It takes you to the second step "Create recommendation." Enter the following details:
1. **Recommendation name**: Enter a name for the recommendation.
2. **Recommendation description**: Enter a description for the recommendation. This description will help you understand the model's aim.
3. **Catalog**: Select the catalog on which the recommendation will be worked.
4. The model should be as follows:
5. If we are using product names, we can filter by the Category.
6. Click **Create** to save the changes and run the model. Its status will be Active on the Recommendations home page.
1. Navigate to the MoEngage dashboard and select **Content** > **Recommendations** from the left navigation. The Recommendations page is displayed. For more information, refer to [Creating User Action Recommendations](/user-guide/content/recommendations/basic-recommendations/user-actions-model).
2. At the top right corner, click **+ Create recommendation**. This will take you to the first step, "Select recommendation model."
3. Select the **Similar items** model and click **Next**. It takes you to the second step "Create recommendation." Enter the following details:
1. **Recommendation name**: Enter a name for the recommendation.
2. **Recommendation description**: Enter a description for the recommendation. This description will help you understand the model's aim.
3. **Catalog**: Select the catalog on which the recommendation will be worked.
4. The model should be as follows:  Here, Product\_id is the category. While filtering, note that the value category would contain the CAT, UPSE, and so on. This would be compared with User Attributes: Category (or any other user attribute that the clients want to use). Doing this would give you the AI recommendations for the Category.
5. Click **Create** to save the changes and run the model. Its status will be Active on the Recommendations home page.
Now that we have created the recommendation, let us create a Push campaign and personalize it using Recommendations.
# Create a Push Campaign
In this section, let us create a campaign.
## Step 1: Target Users
1. Navigate to the sidebar on the left and click **Engage** > **Campaigns** and click **+ Create campaign** or click **+ Create new** > **Campaign**.
2. Under **Outbound**, select **Push** > **Periodic**.
Here, Product\_id is the category. While filtering, note that the value category would contain the CAT, UPSE, and so on. This would be compared with User Attributes: Category (or any other user attribute that the clients want to use). Doing this would give you the AI recommendations for the Category.
5. Click **Create** to save the changes and run the model. Its status will be Active on the Recommendations home page.
Now that we have created the recommendation, let us create a Push campaign and personalize it using Recommendations.
# Create a Push Campaign
In this section, let us create a campaign.
## Step 1: Target Users
1. Navigate to the sidebar on the left and click **Engage** > **Campaigns** and click **+ Create campaign** or click **+ Create new** > **Campaign**.
2. Under **Outbound**, select **Push** > **Periodic**.  \
You are taken to the first step, "Target users," of defining your campaign.
3. Enter the following details:
* **Team**: Select a team if your organization has teams enabled for your account.
* **Campaign name**: Enter a name for the campaign.
* **Campaign tags**: Select the required campaign tags.
4. In the **Target Audience** section, select **All users**.
\
You are taken to the first step, "Target users," of defining your campaign.
3. Enter the following details:
* **Team**: Select a team if your organization has teams enabled for your account.
* **Campaign name**: Enter a name for the campaign.
* **Campaign tags**: Select the required campaign tags.
4. In the **Target Audience** section, select **All users**. 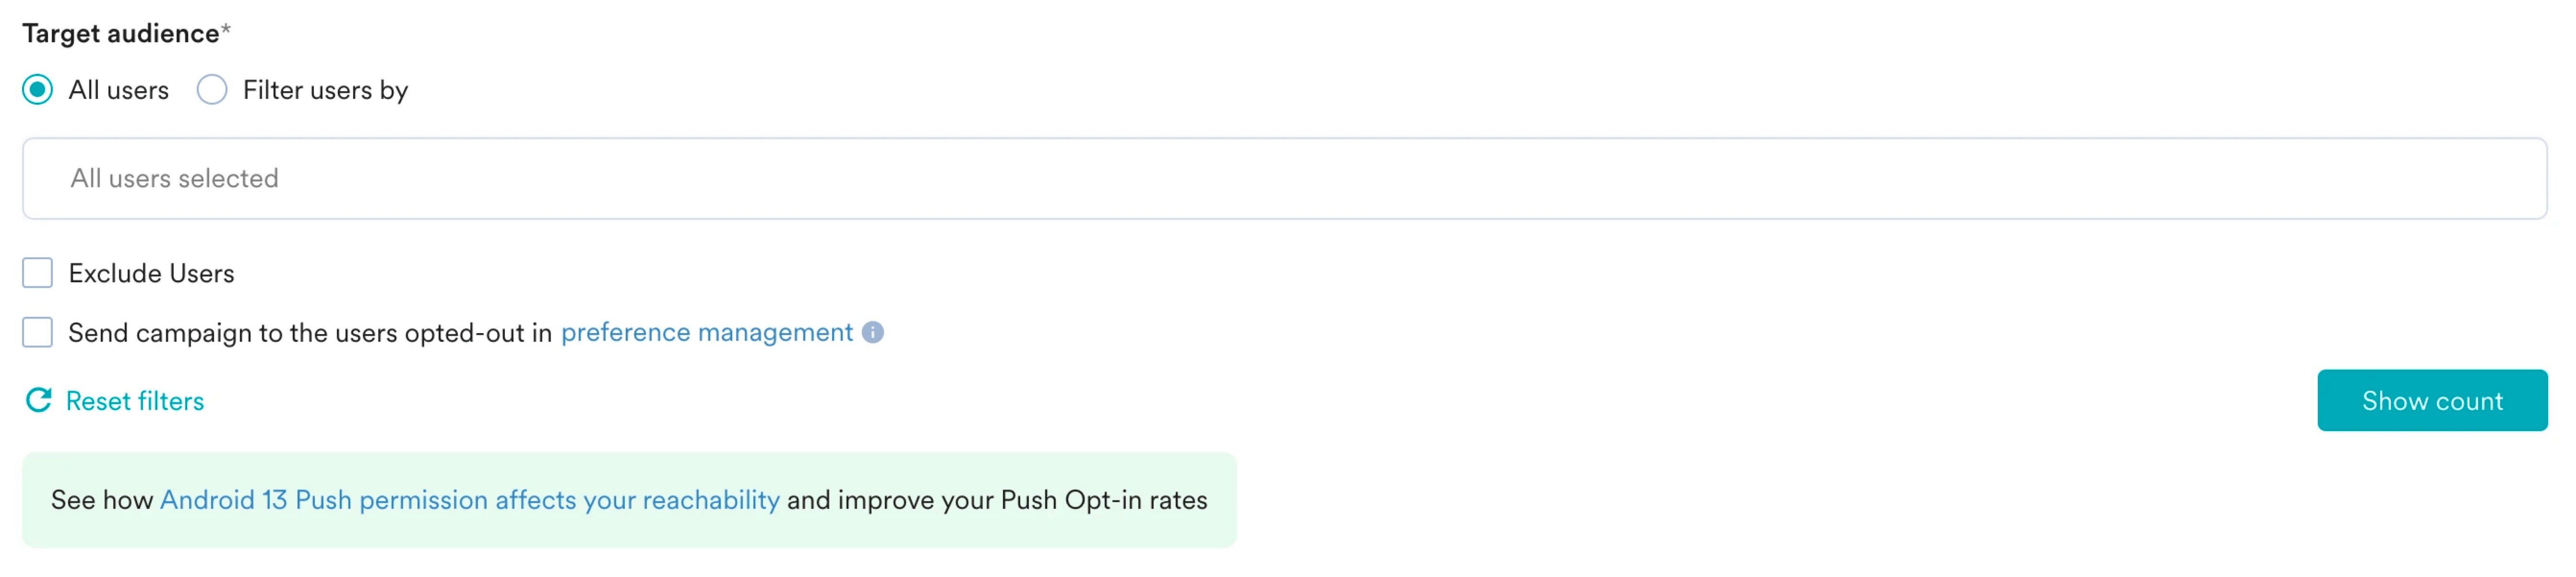 5. In the **Target Platforms** section, select **Android**.
 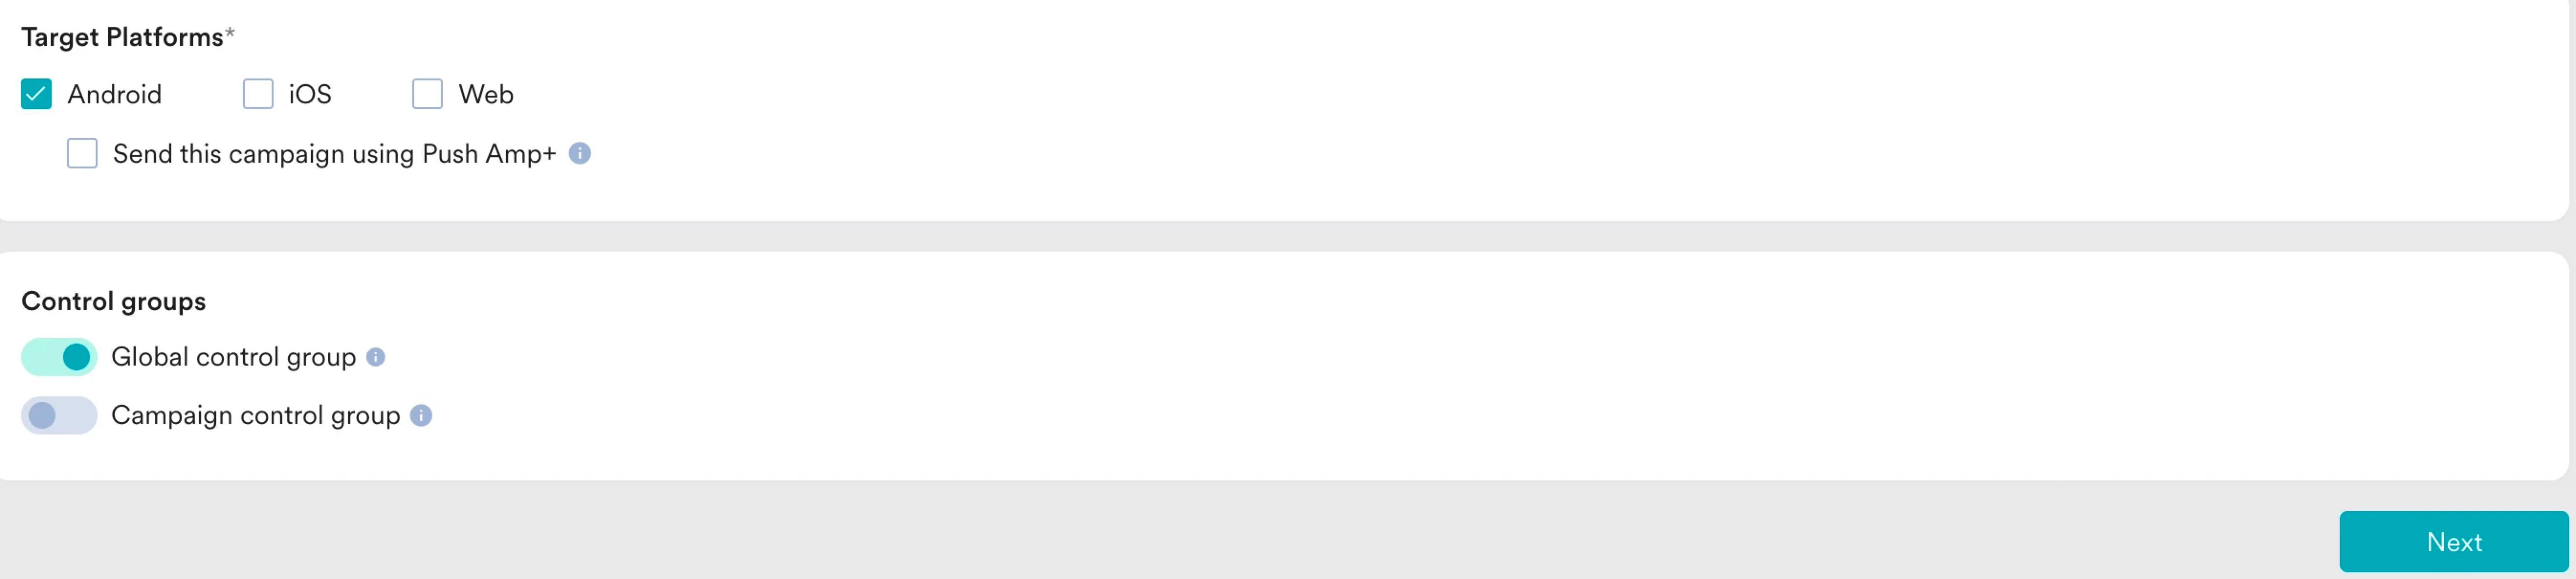 6. Click **Next** to move to the second step, "Content," where you can define the content for your Push campaign.
## Step 2: Content
1. Select the template that you would like to use. For our example, select **Basic notification**.
6. Click **Next** to move to the second step, "Content," where you can define the content for your Push campaign.
## Step 2: Content
1. Select the template that you would like to use. For our example, select **Basic notification**. 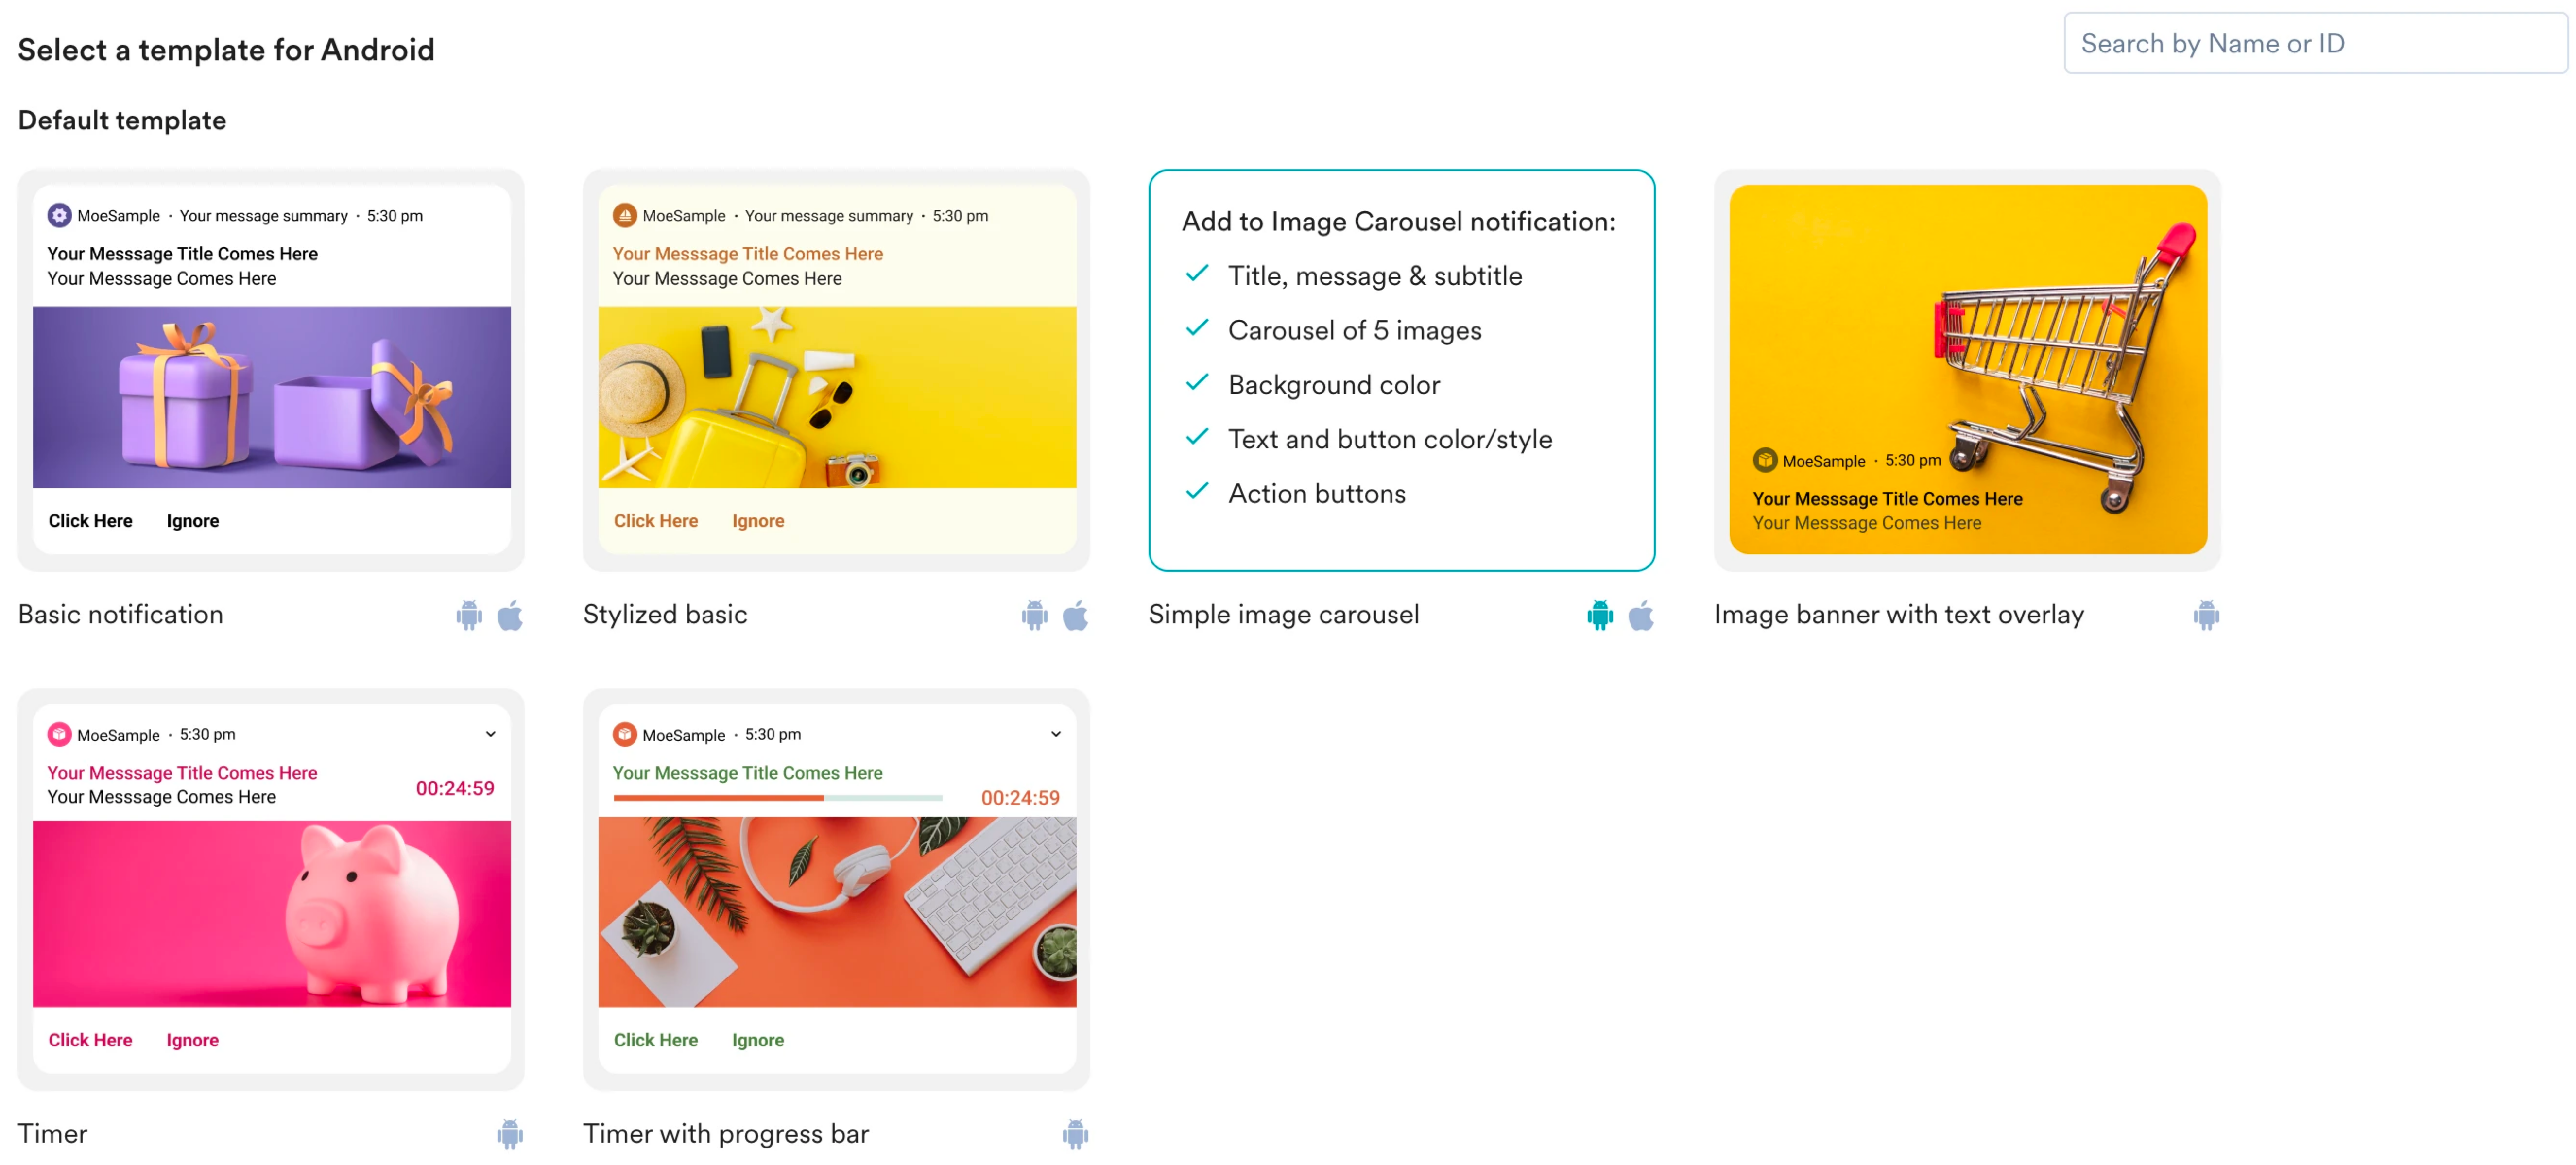 2. In the **Message title** field, enter a title.
3. While defining the message, select the product set that is generated through the recommendation [that you defined](/use-cases/recommendations/how-to-nudge-users-to-continue-watching-content). Enter “@” and search for "DemoRecommendations,“ the name of the recommendation that you built, in the Push Personalization pop-up.
2. In the **Message title** field, enter a title.
3. While defining the message, select the product set that is generated through the recommendation [that you defined](/use-cases/recommendations/how-to-nudge-users-to-continue-watching-content). Enter “@” and search for "DemoRecommendations,“ the name of the recommendation that you built, in the Push Personalization pop-up. 
 \
Using recommendations, you can personalise the campaign—title, body, and landing page. For example, if the client wants three different communications, you can have three different communications with three different recommendations in each. You can also put in an Email in the same order.
\
Using recommendations, you can personalise the campaign—title, body, and landing page. For example, if the client wants three different communications, you can have three different communications with three different recommendations in each. You can also put in an Email in the same order.  \
Row 1 is Recommendations for Choice 1; Row 2 is Recommendations for Choice 2; and Row 3 is Recommendations for Choice 3. These are the recommendations based on the Product or Category.
4. Click **Next** to move to the third step, "Schedule and goals," where you can define your campaign's schedule and goals.
## Step 3: Schedule and Goals
1. In the **Send campaign** section, select when the campaign should be delivered to your users and the periodicity of delivery.
2. Change the deliverability settings based on your requirements. For more information about these settings, refer to [Create Push Campaigns](/user-guide/campaigns-and-channels/mobile-push/create/create-push-campaigns).
\
Row 1 is Recommendations for Choice 1; Row 2 is Recommendations for Choice 2; and Row 3 is Recommendations for Choice 3. These are the recommendations based on the Product or Category.
4. Click **Next** to move to the third step, "Schedule and goals," where you can define your campaign's schedule and goals.
## Step 3: Schedule and Goals
1. In the **Send campaign** section, select when the campaign should be delivered to your users and the periodicity of delivery.
2. Change the deliverability settings based on your requirements. For more information about these settings, refer to [Create Push Campaigns](/user-guide/campaigns-and-channels/mobile-push/create/create-push-campaigns). 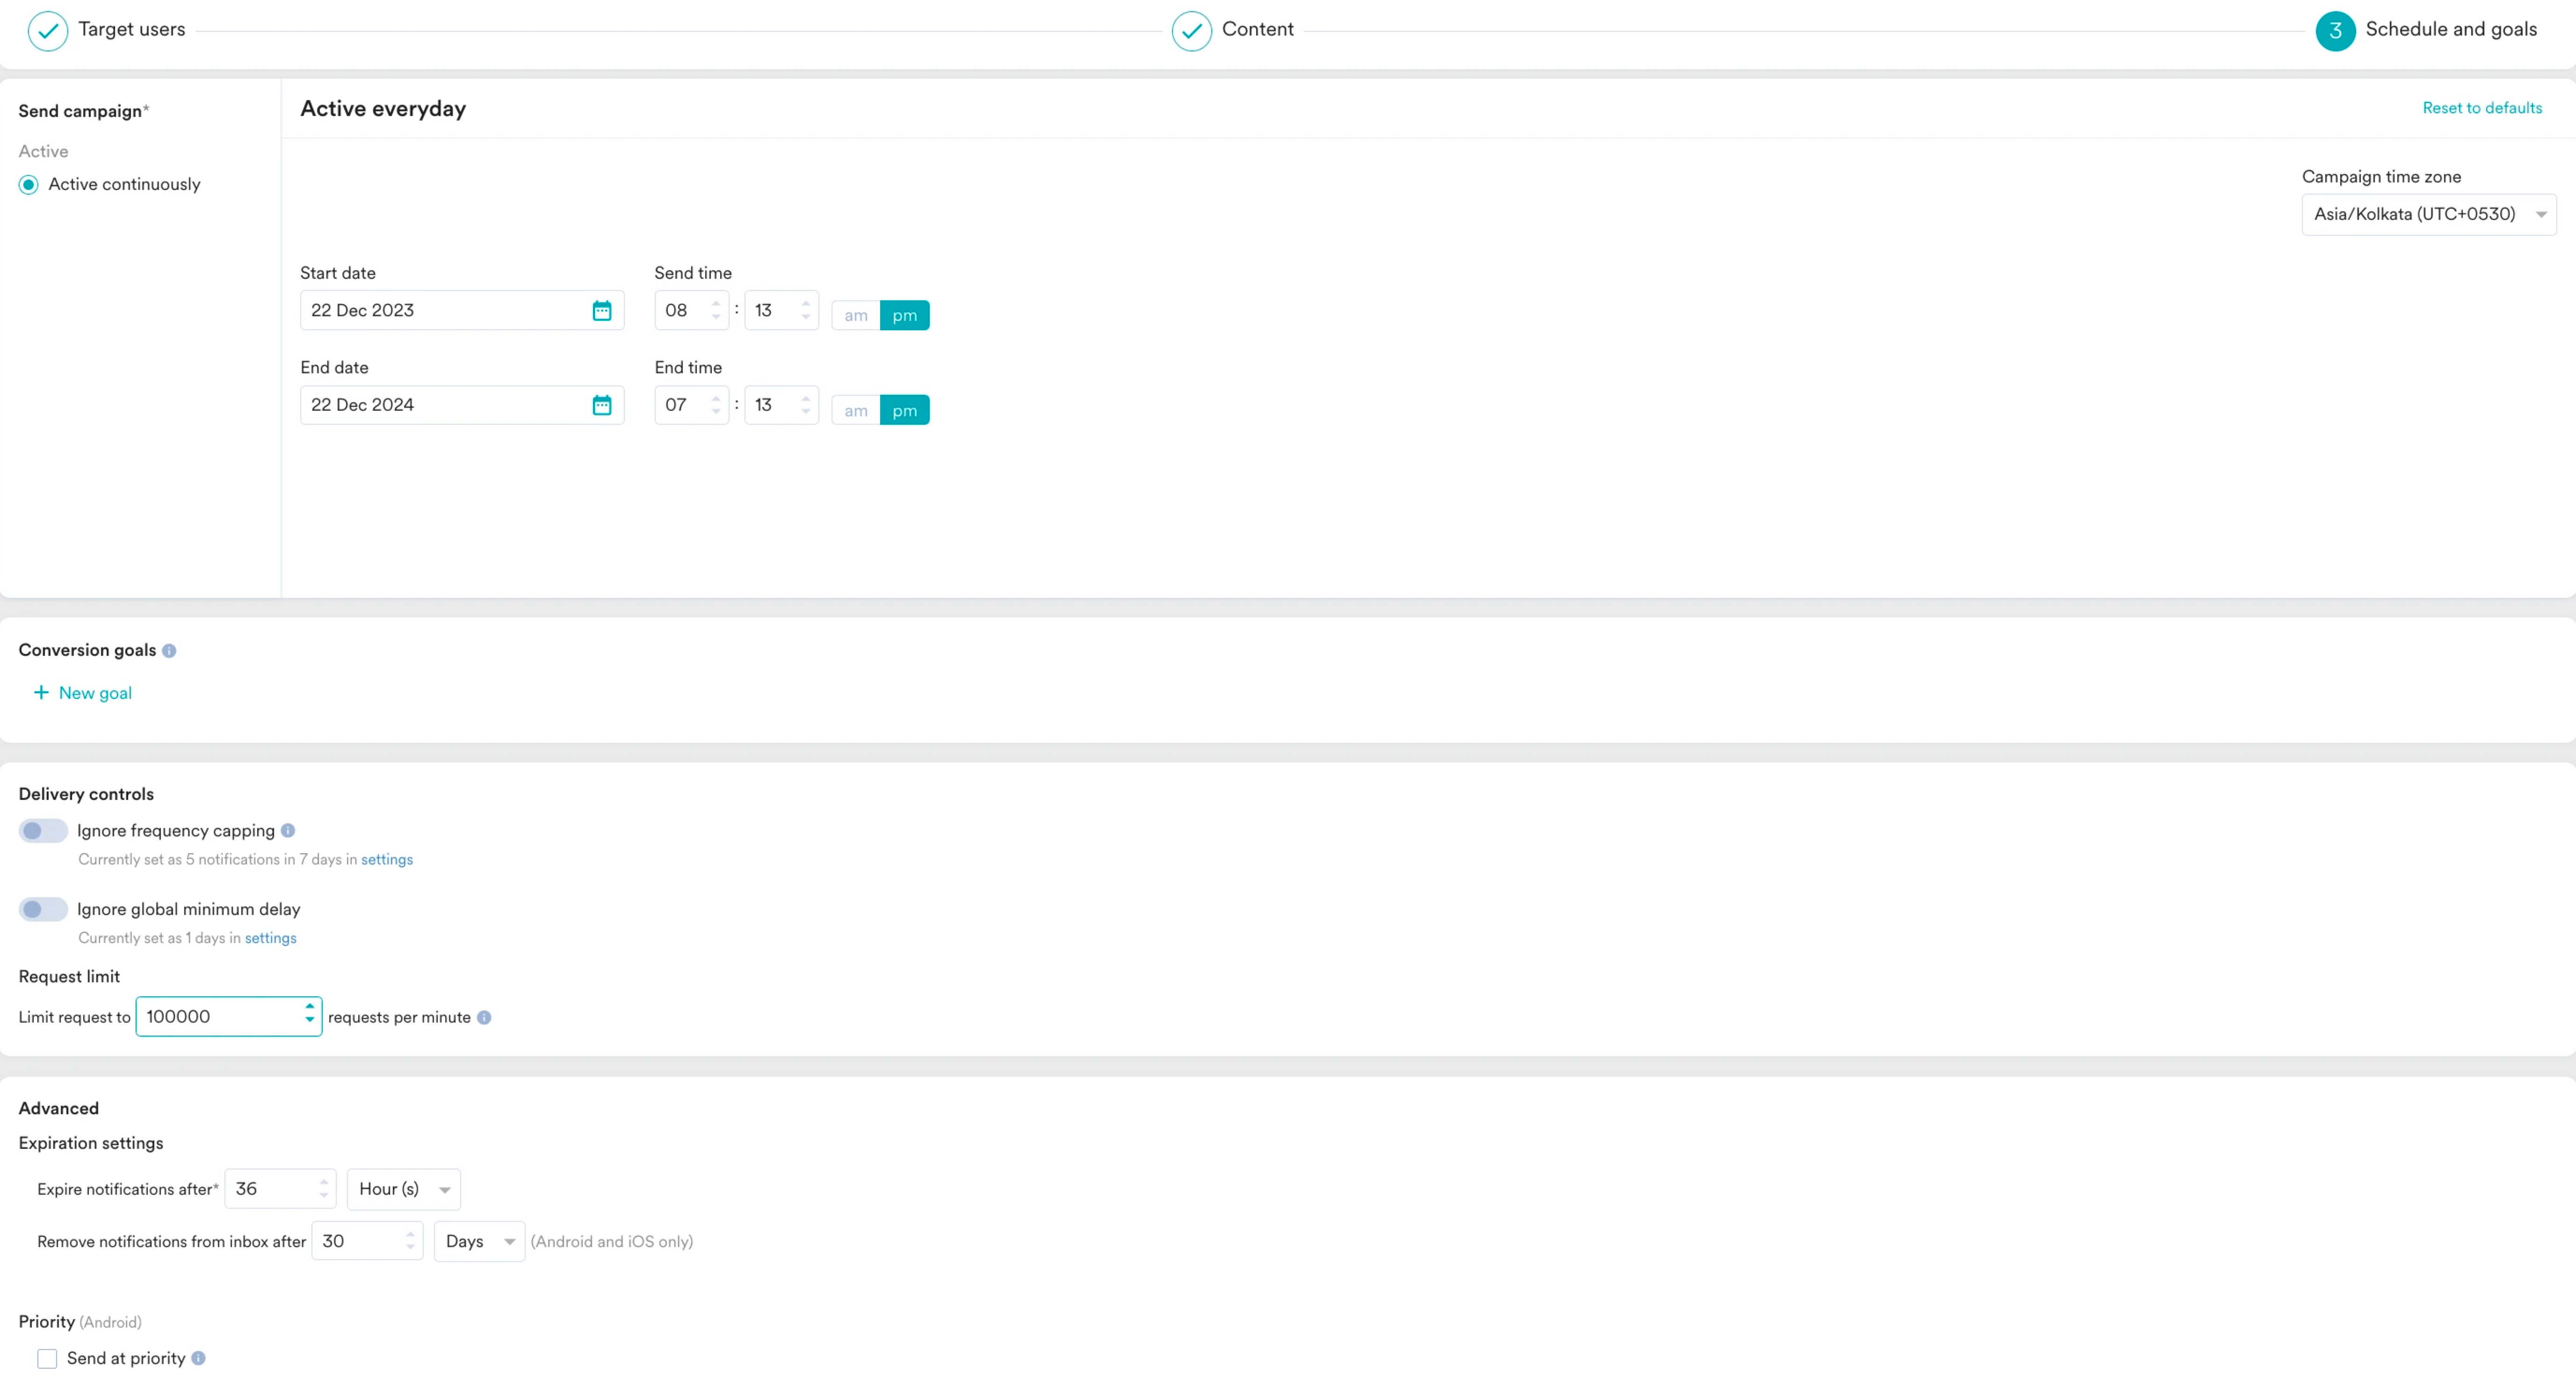 3. Click **Publish**.
# Conclusion
In this article, learned how to upsell or cross-sell courses and study materials to students using MoEngage recommendations.
Recommendations are a key to increasing and improving the app's usage. These outbound recommendations not only nudge the users, but sending them at the right time also entices them to try more recommendations or courses.
3. Click **Publish**.
# Conclusion
In this article, learned how to upsell or cross-sell courses and study materials to students using MoEngage recommendations.
Recommendations are a key to increasing and improving the app's usage. These outbound recommendations not only nudge the users, but sending them at the right time also entices them to try more recommendations or courses.