> ## Documentation Index
> Fetch the complete documentation index at: https://moengage-analytics-query-api-docs.mintlify.site/llms.txt
> Use this file to discover all available pages before exploring further.
# Drag and Drop Editor
> Customize every element of your MoEngage in-app campaign with the drag and drop editor. Start from scratch or use pre-built templates for quick setup.
The new **Drag and Drop editor** lets you customize everything about your In-app campaign. MoEngage allows you to customize and work with our pre-built templates or build a new campaign from scratch.
You can access the Drag and Drop editor in the content section of an In-app campaign. Here, you get two options.
* [Start with a blank canvas](#start-with-a-blank-canvas)
* [Explore pre-built templates](#explore-pre-built-templates)
## Video Tutorial
# Start with a blank canvas
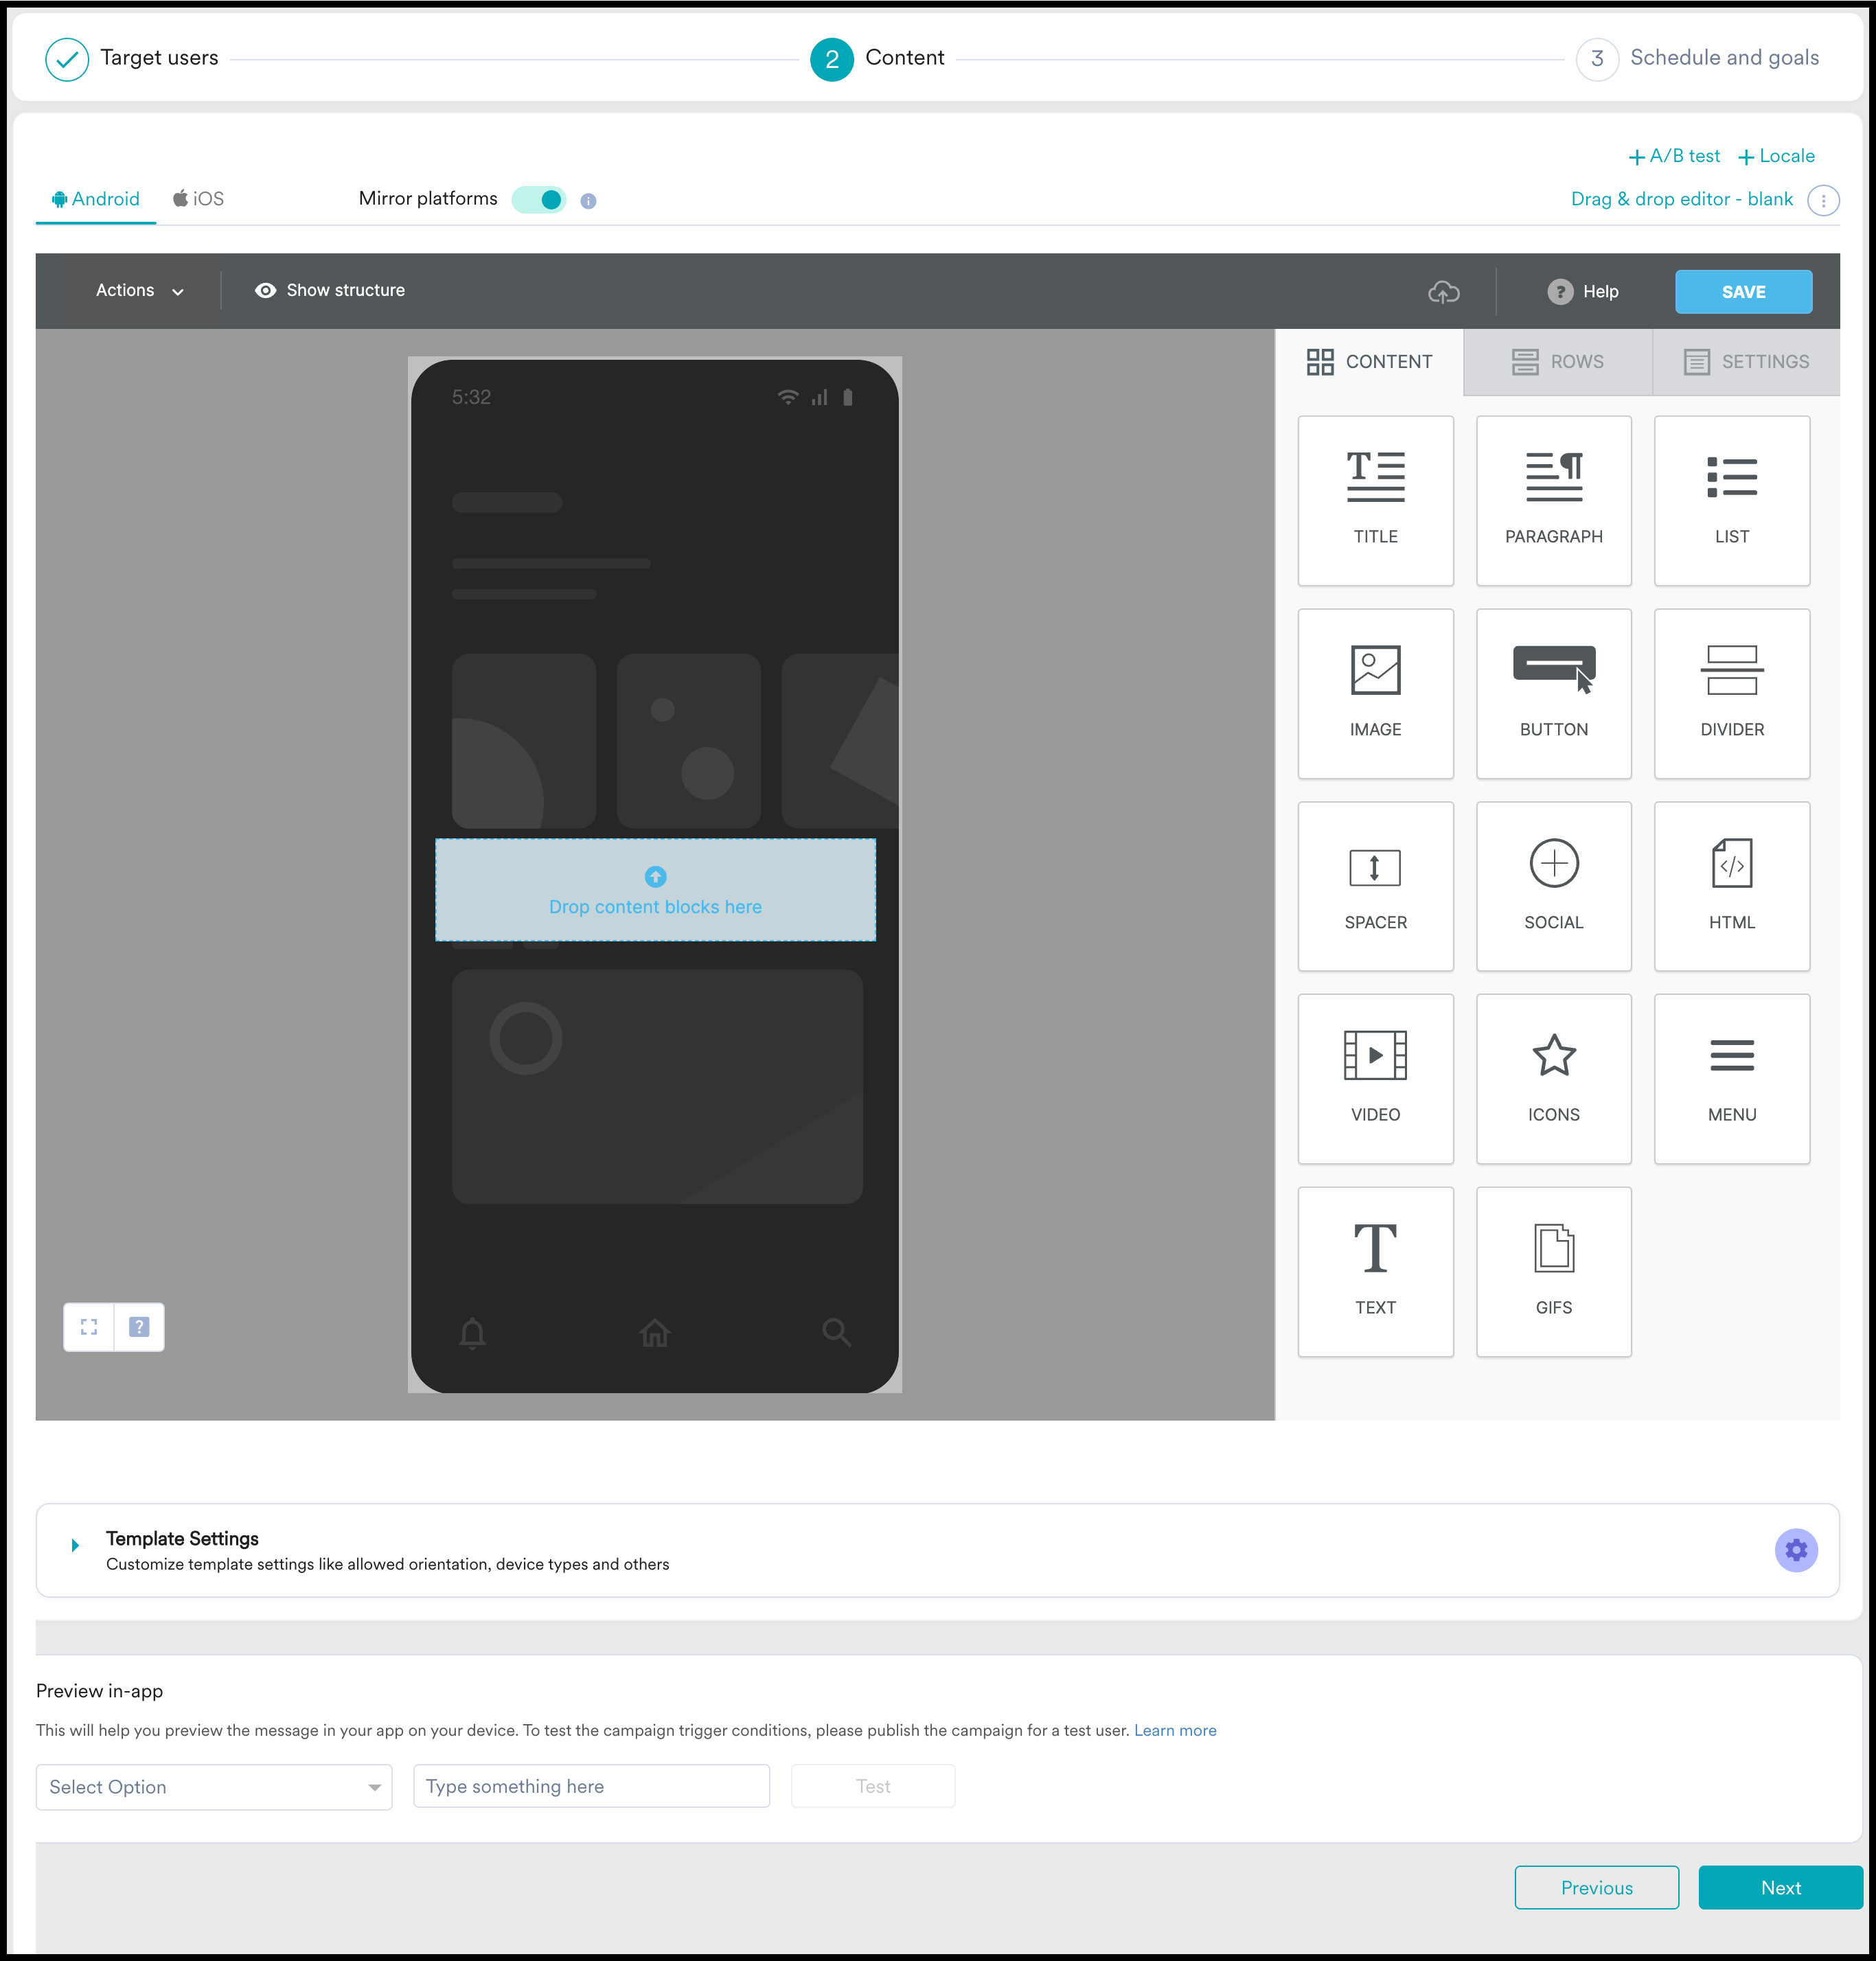
When you click on **Start with a blank canvas**, you will get redirected to the Drag and drop editor.
## Content
The content section contains all the blocks you can add to your In-app campaign. To get started with your campaign, a row is automatically added where you must add the content blocks.
1. **Title**: The title block lets you add a title text to the campaign. You can change the styling and font of the title by clicking on the **Title block**. This will open a **Content Properties**section on the right-hand side where you can make further modifications.
* You can also delete or duplicate the block by clicking on the **Delete** and **Duplicate** icons below the block.
2. **Paragraph**: The paragraph block lets you add text to the campaign. You can make similar modifications to the text here as the title block.
3. **List**: The list block lets you add an unordered list to the campaign. You can make similar modifications to the text here as the title block.
4. **Image**: The image block lets you add an image to the campaign. You can either drag and drop an image on the block or click on **Browse**and upload a new image.
* After adding your image, you can modify its width and alignment from the editor on the right-hand side. You can also click on **Apply Effect**to filter, resize, crop, or do more with your image.
* You can add links to your image and enable click tracking on it by using attributes.
5. **Button**: The button block lets you add a button to the campaign. You can style the buttons and add actions to them as well. Drag and drop the button to the screen and click on it to get the edit options.
6. **Divider**: The divider block can be used to add a divider between two other content blocks or rows. You can modify the width and styling of the divider in the content properties section.
7. **Spacer**: The spacer block can be placed between two content blocks or rows to add some separation between the two.
8. **Social**: The social block lets you add social media links to your campaign. You can add the relevant URLs in the content properties section on the right-hand side of the editor.
* You can also click on **New Element** in the content properties section to add any other social media links that you might want to include in the campaign.
9. **HTML**: The HTML block lets you add custom HTML to your campaign.
10. **Video**: The video block lets you add a video to your campaign. You can upload a YouTube video, a Vimeo video, or a URL for a video.
11. **Icons**: The icon block lets you add an icon to your campaign. You can click on **Apply Effects**in the content properties section to filter, resize, crop, or do more with your icon.
* Other than changing the icon image itself, you can also modify the URL of the icon and some text to the icon by enabling the **More options** button.
12. **Menu**: The menu block allows you to create a menu in your campaign. You can add multiple items here and modify them in the content properties section.
13. **Text**: The text block lets you add text to your campaign. You can edit the text directly inside the text block, and you can add font and styling options to it by clicking on the text block and accessing the editor above it.
14. **GIFs**: The GIFs block lets you add a video to your campaign. You can search for GIFs with Giphy and select the GIF that you want to add.
15. **Form**: The Form box allows you to add a form to your campaign to collect user information within your app. To learn more, see [Add Forms to your In-app Campaign](/user-guide/campaigns-and-channels/in-app-message/templates/drag-and-drop-editor/add-forms-to-your-in-app-campaign).
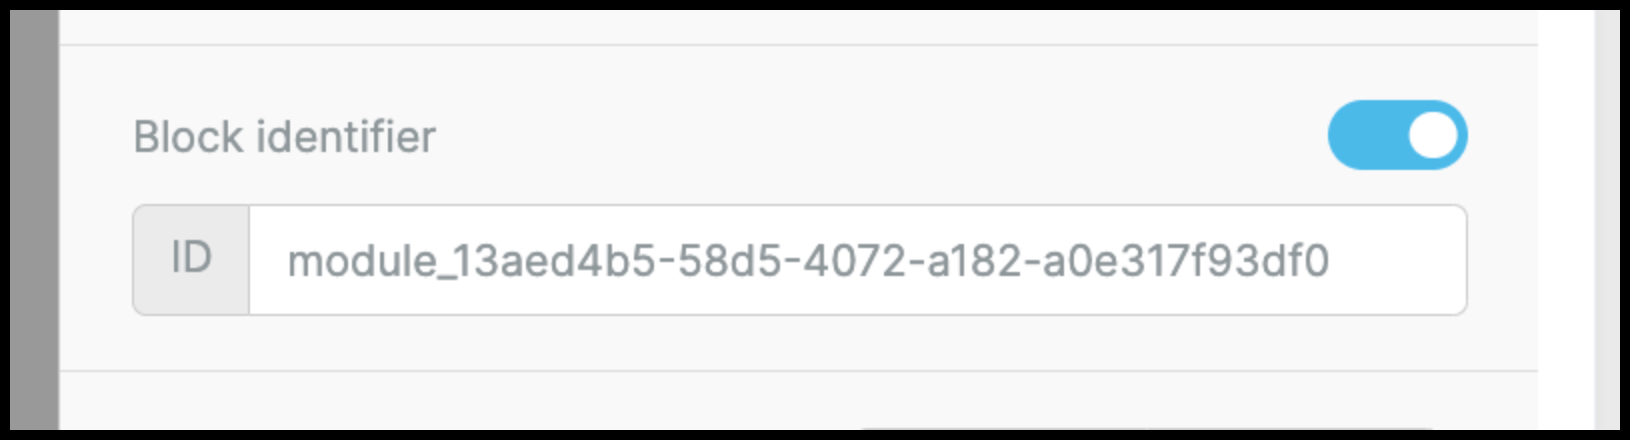
If you want to overwrite the CSS for a content block, you can toggle the **Block identifier** in the **Content Properties** section and retrieve the ID of the content block. You can use this ID to change the CSS for the content block by using it in the HTML element. Please take a look at the FAQs to learn more about how you can use this to modify fonts in the template.
## Portrait vs. Landscape Mode
The rendering of your In-app campaign varies a lot between portrait mode and landscape mode. You can modify and edit the content blocks that you use to ensure that your campaigns do not look out of place.
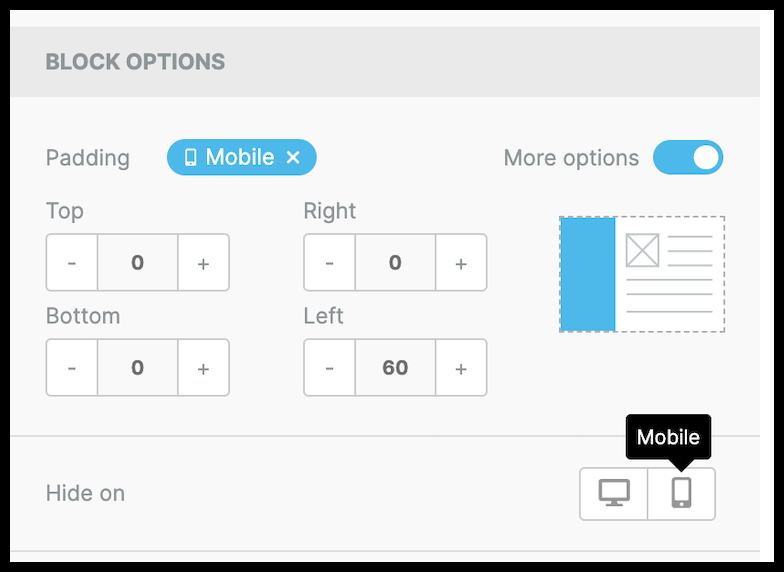
1. You can choose to hide a content block in either portrait or landscape mode.
* Navigate to **Block Options**in the **Content Properties**section.
* Ensure that the **More options** button is enabled.
* Click on the **Mobile**icon if you want to hide the content block in portrait mode.
* Click on the **Desktop** icon if you want to hide the content block in landscape mode.
2. You can also use the **Auto width** section under **Content Properties**to modify your In-app campaign for landscape mode.
* Select the **Full width on mobile**checkbox if you want the element to cover the width of the screen in portrait mode.
* You can then modify the width of the content block on landscape mode by using the slider.
* Alternatively, you can also select the **Auto width**option which fixes the width of the content block automatically.
## Attributes
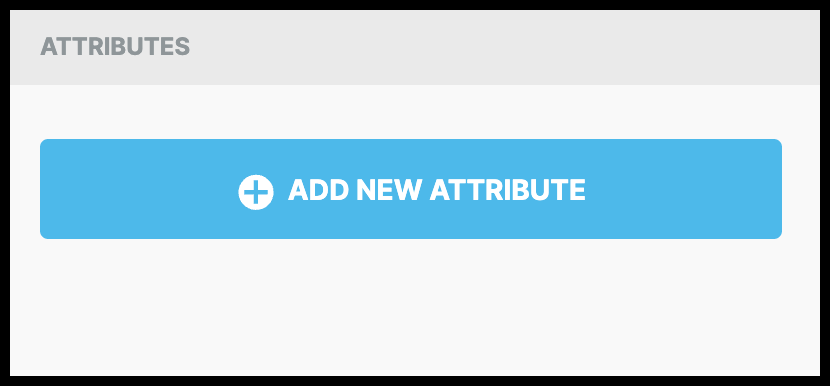
You can add **attributes** to images, videos, buttons, and GIFs. To do so, scroll down in the **Content Properties** section on the right-hand side of the editor and click on **+ Add New Attribute**. You can either search from the attributes provided to you or add your own custom attributes.
The list of attributes provided by MoEngage is:
1. **Navigation**: This action will allow you to open a webpage inside your app in web view when your users click on the content block you assigned this attribute to.
2. **Track Event**: This action allows you to track an event on click of the In-app message and also track an event attribute along with this.
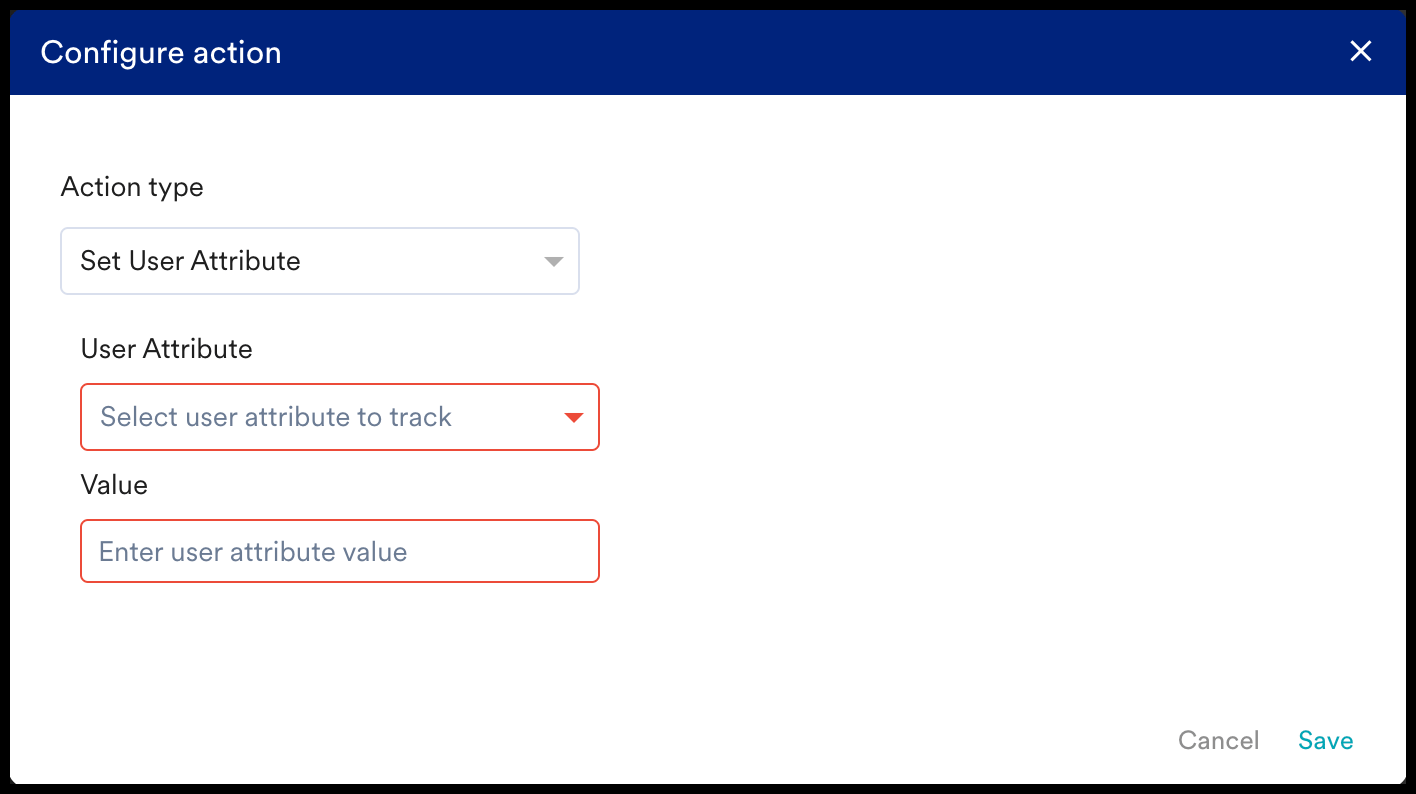
3. **Set User Attribute**: This action will assign a value of your choice to any user attribute that you want to modify. As soon as the user clicks on a content block with this attribute, the user attribute that you chose will be set as the value you entered.
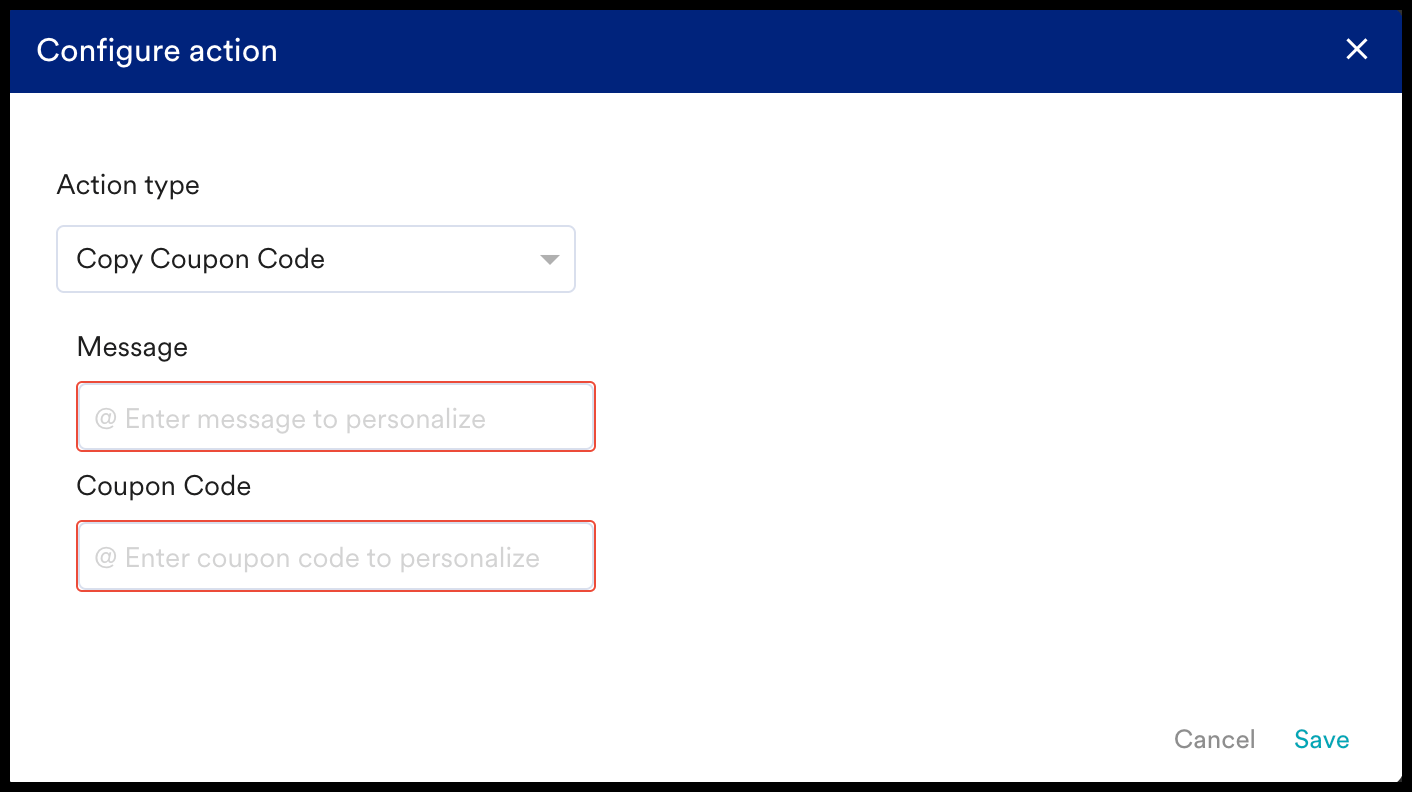
4. **Copy Coupon Code**: This action allows you to add a Coupon code to a content block. When the user clicks on the content block, the coupon code will get copied in their keyboard. You can also add some personalization to this attribute.
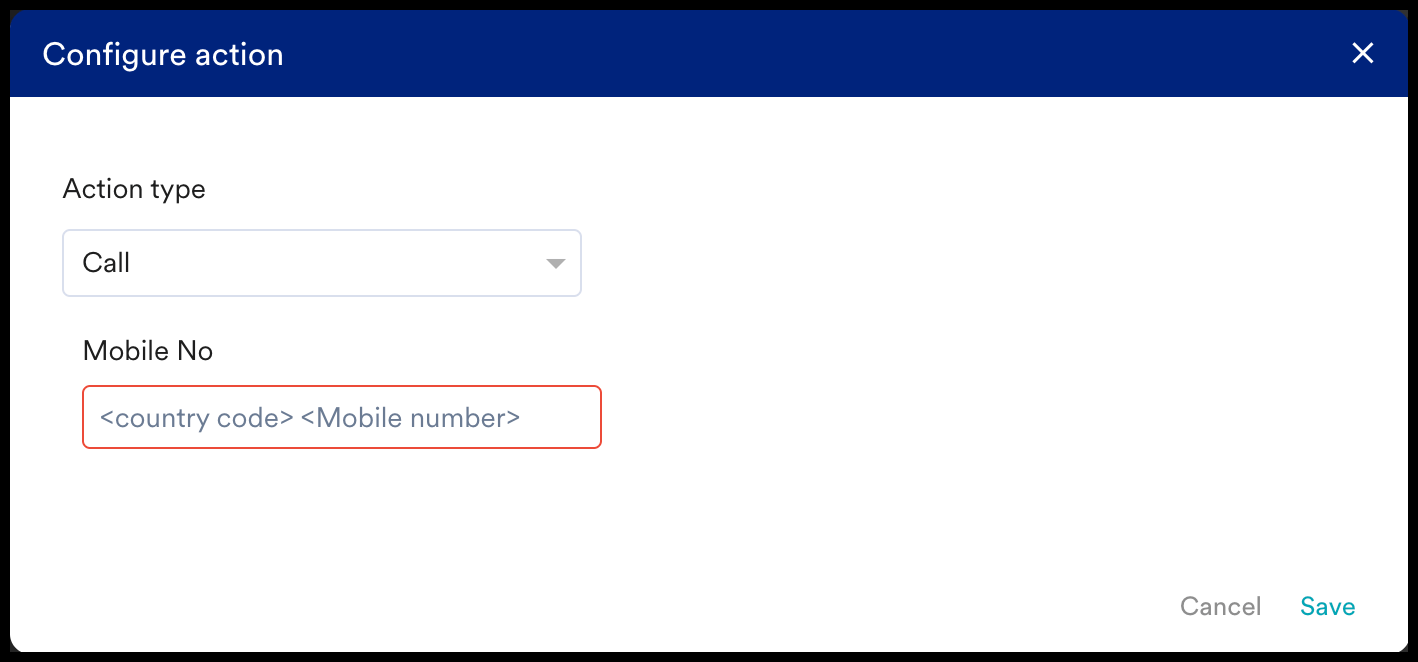
5. **Call**: You can now call a user as soon as they click on on the content block you assigned this attribute to. Enter the *Mobile No.* to do so.
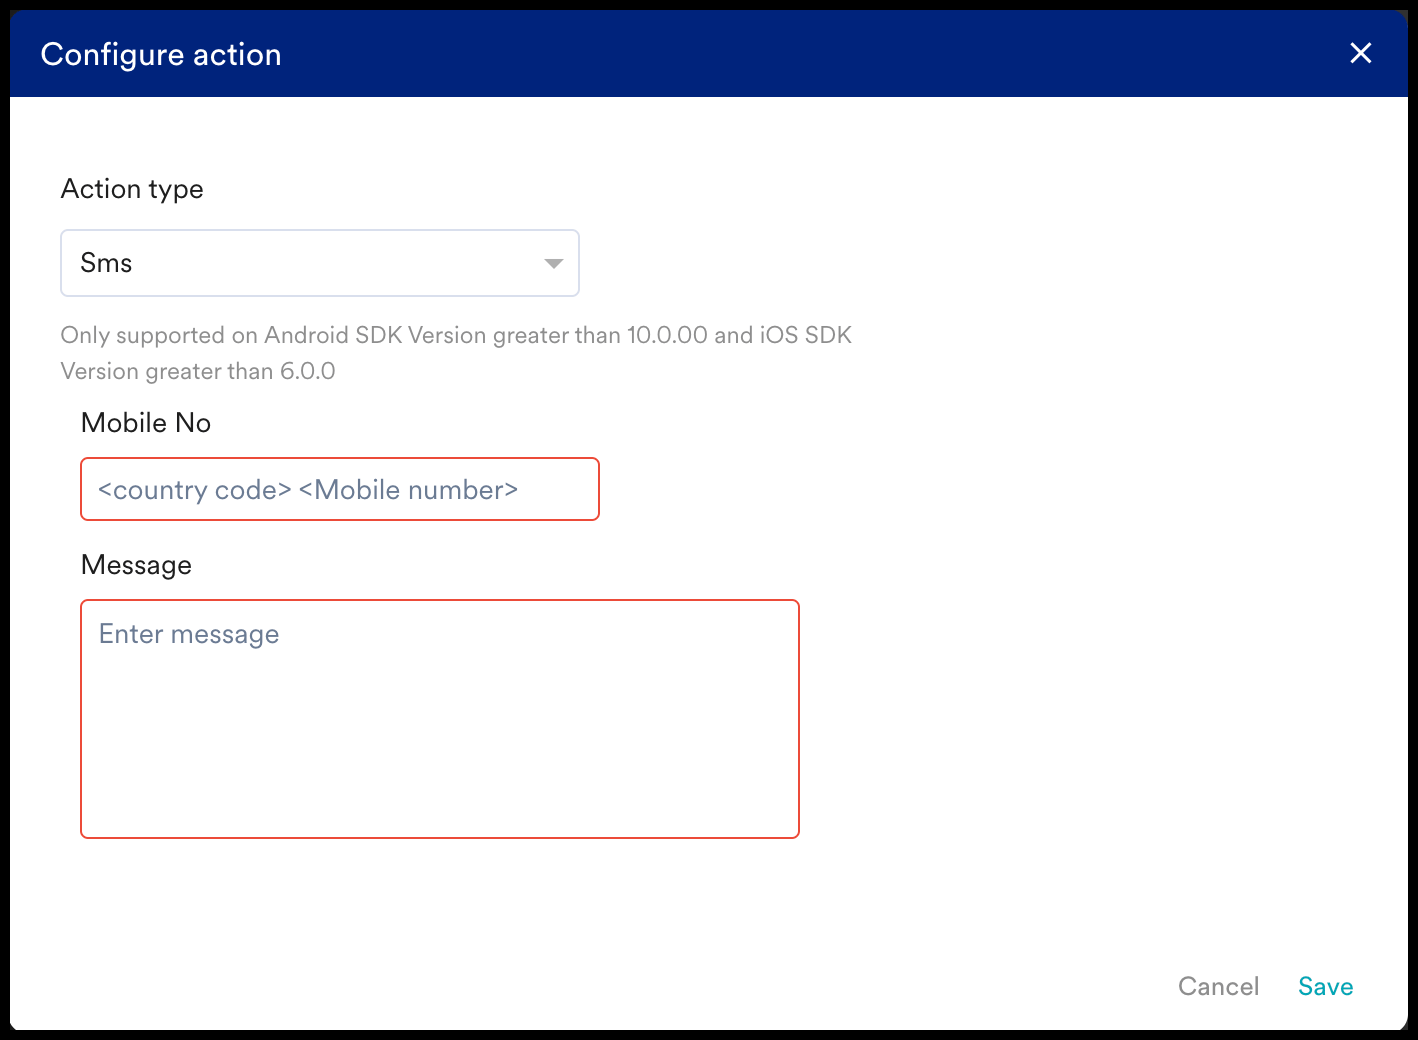
6. **SMS**: You can send a message to the user as soon as they click on your message. Enter the *Mobile No*. and the *Message* content to send your SMS.
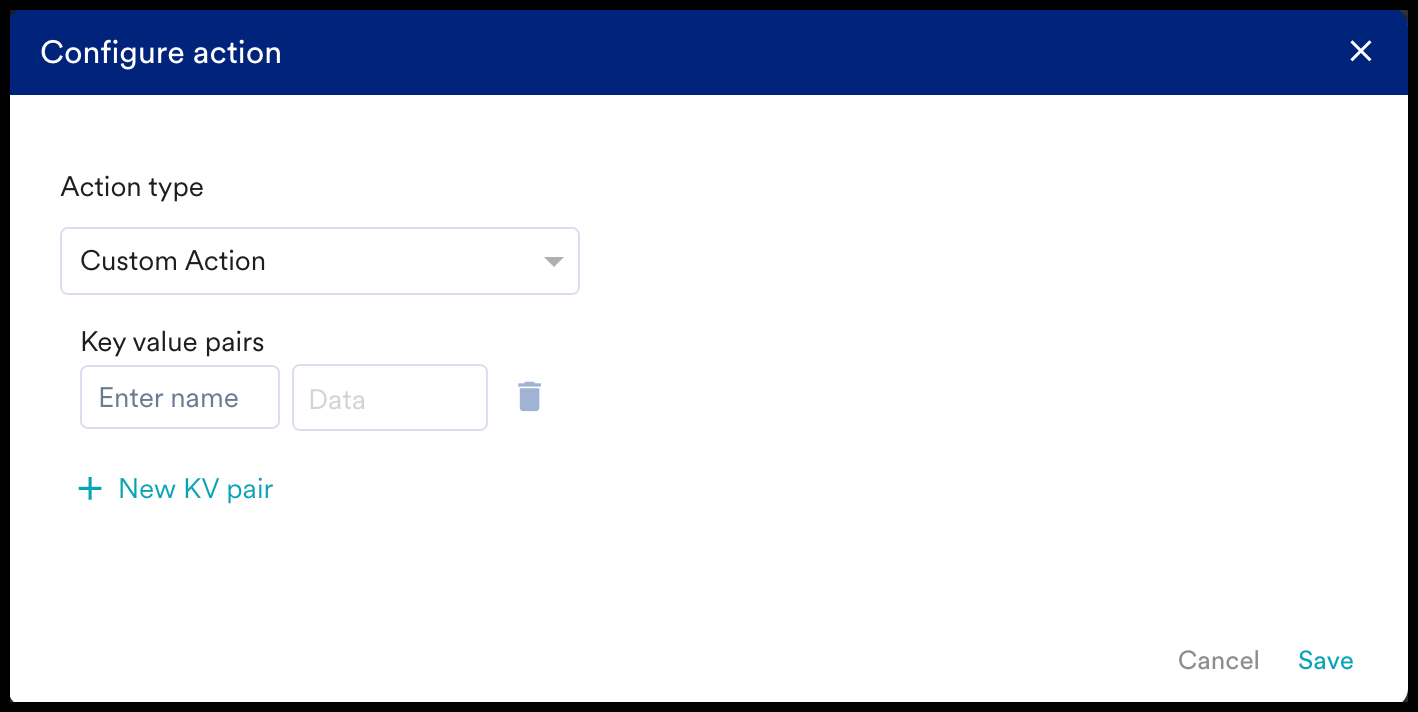
7. **Custom Action**: You can also define custom actions in your mobile app which can then be executed when the user clicks on the In-app campaign.
8. **Navigate to Notification Settings**: When a user clicks on the content block with this attribute, they will be redirected to their notification settings for your app.
* Click tracking is automatically enabled for all content blocks where an action is added.
* If you add multiple types of action on a single content block, then each action will account for one tracked click.
## Rows
You can drag and drop a row onto the screen to create a layout for your In-app campaign. All content blocks are added to a row where their positioning and placement can be modified.
#### Row Properties
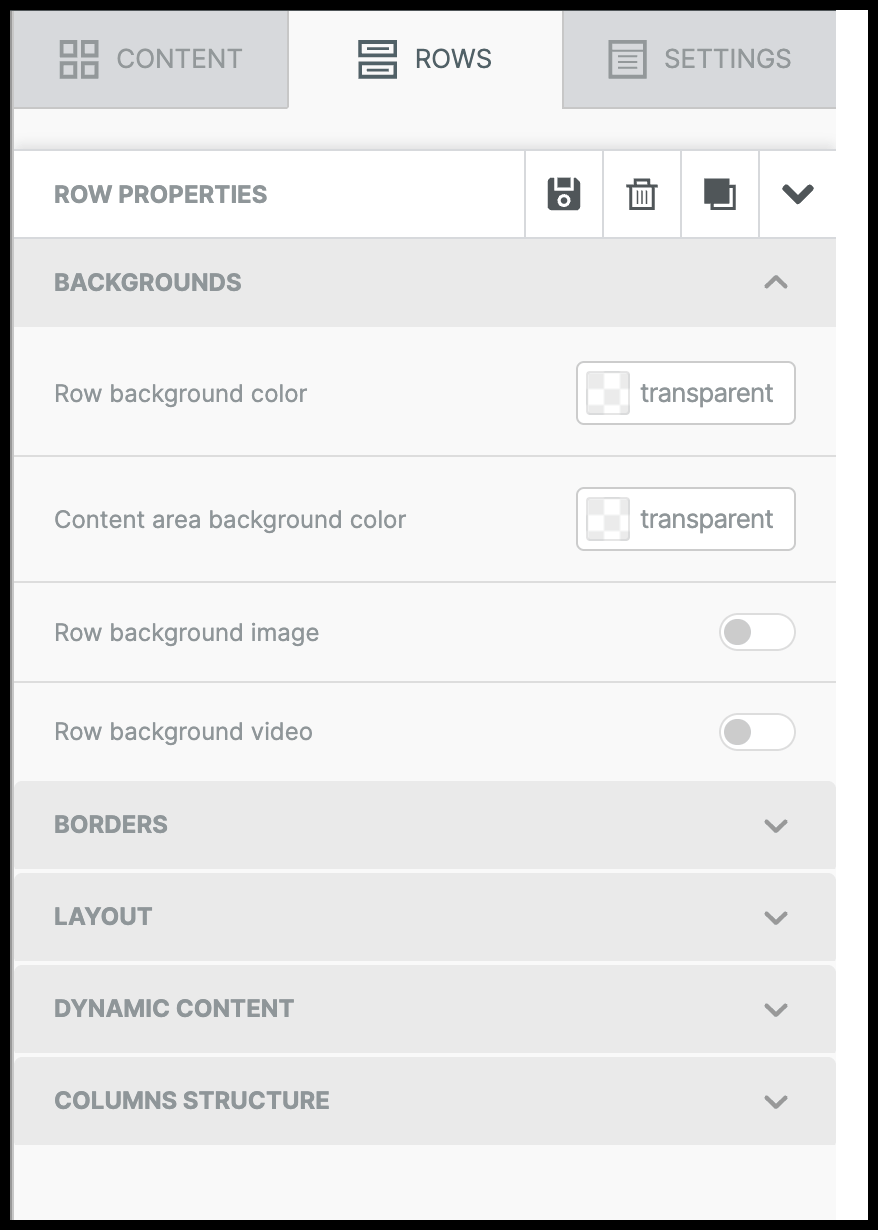
When you click on a Row on the editor, you can access the **Row Properties**section on the right-hand side of your screen. In this section, you can modify the background of the row, the layout of the row, the column structure, and more.
You can also modify the background color of the row, and add an image or video to it if you want.
The **Content area background color**option provides a background color to the text of the row. If you choose to use the **Row background color**option instead, it fills in the entirety of the background of the row.
### Settings
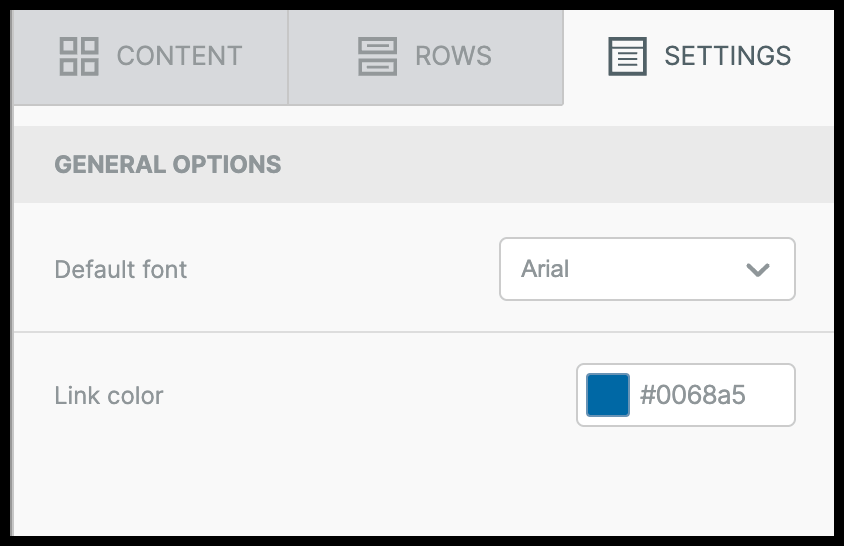
The settings in the editor can be used to standardize a default font and link color for all your links.
# Explore pre-built templates
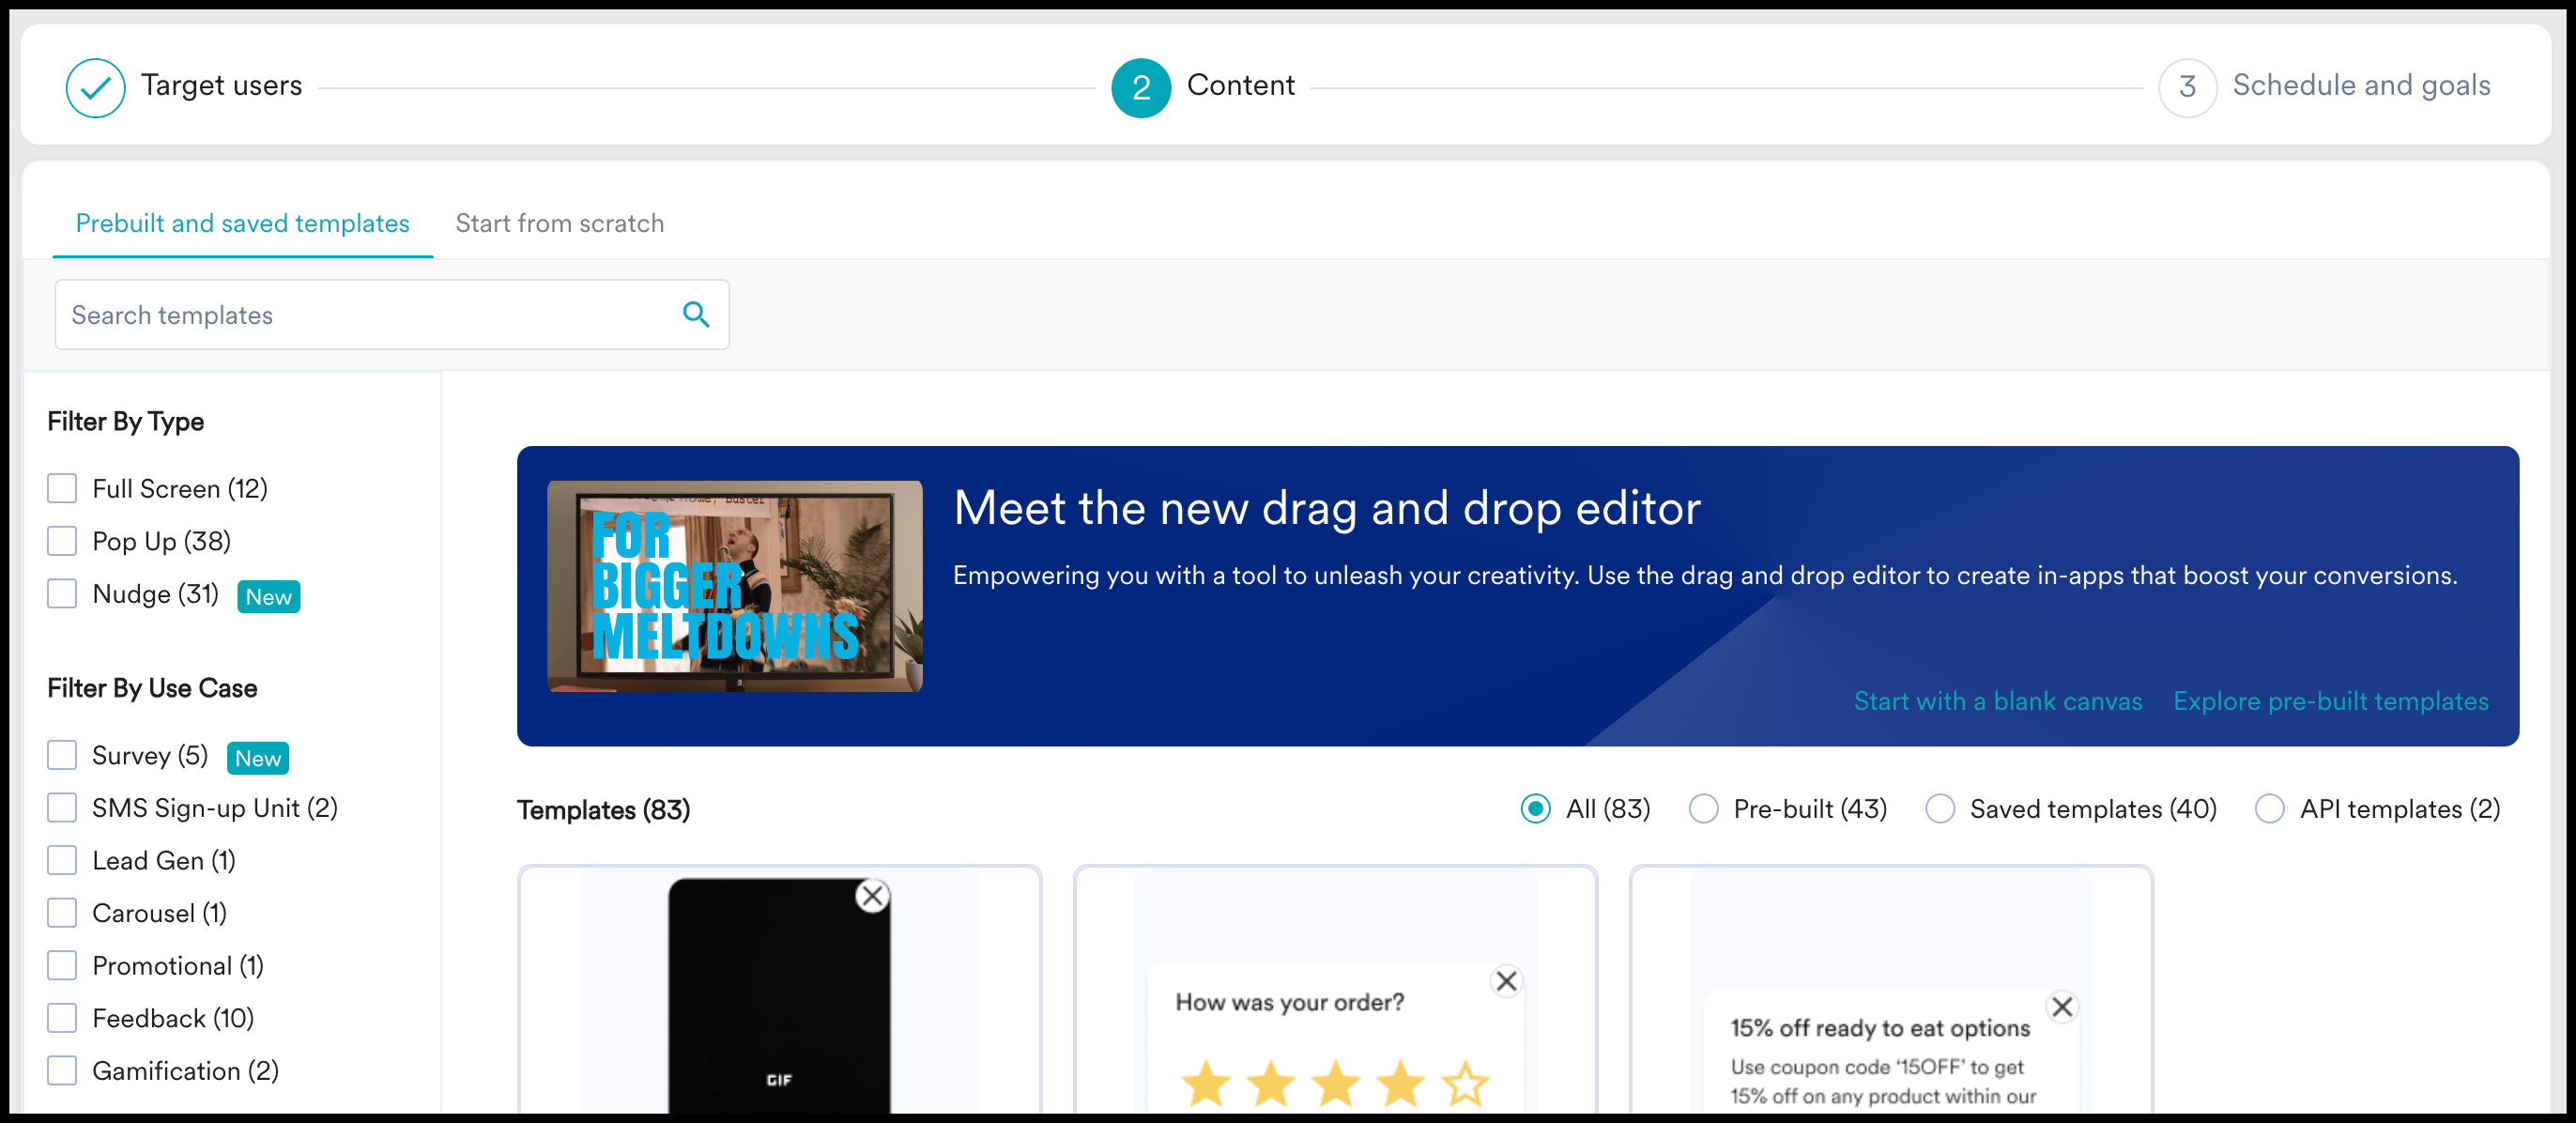
To find the pre-built templates for **drag and drop editor**, you can either click on **Explore pre-built templates** or find them through the filter.
* Search: Search for **Drag and drop** in the **Search templates**section.
* **Filter By Editor**: Select the **Drag and drop**checkbox and view the available templates.
You can customize all of the blocks on the pre-built templates and create your In-app campaign.
## Templates
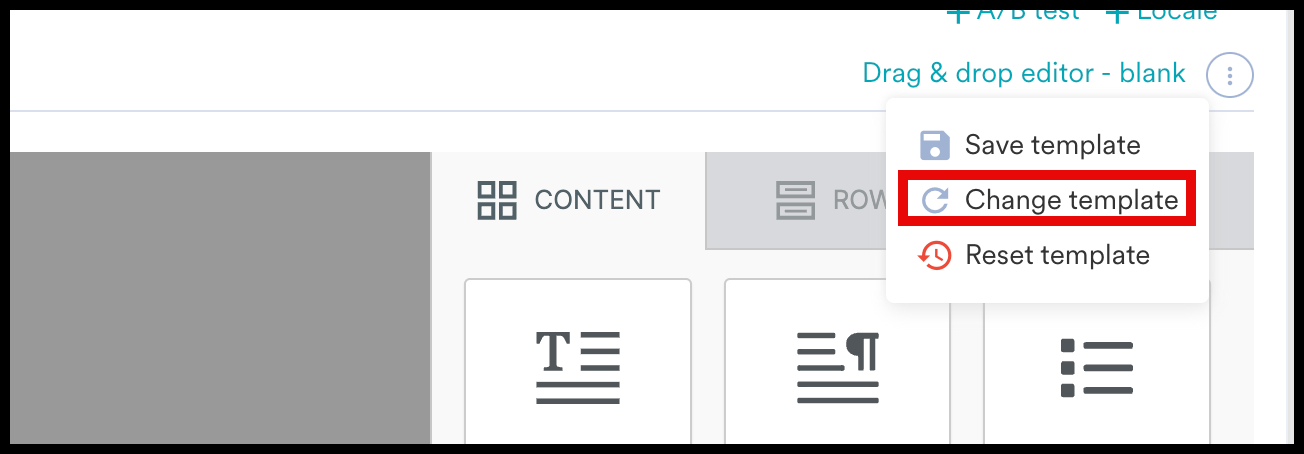
You can save, change, or reset a template by clicking on the **menu** icon on the top right-hand side of the editor. When you click on **Change template**, you will be redirected to the template selection menu where you can choose to work with a blank canvas or use one of MoEngage's prebuilt templates.
The **Mirror Platforms**option on the top of the **Drag and drop editor**lets you simultaneously make the same changes in both iOS and Android platforms.
### Template Settings
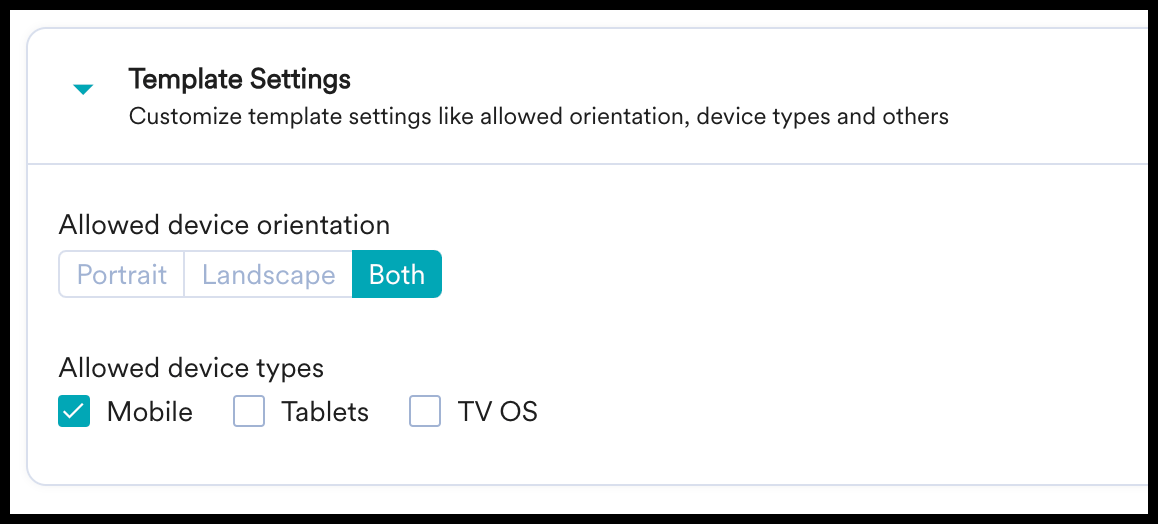
You can select the **Allowed device orientation**by navigating to **Template Settings**at the bottom of the editor. You can also select the device types where you want the In-app campaign to be visible.
# FAQs
## How to Use Custom Fonts in the In-App Drag and Drop Editor?
To incorporate custom fonts into your templates using MoEngage's in-app drag and drop editor, follow these detailed steps:
#### **1. Host Your Font File**
First, ensure that your custom font file is hosted on a secure domain or a publicly accessible URL. For example, you can use a URL like `https://yourdomain.com/fonts/yourfont.ttf`.
For demonstration purposes, here's a sample link to the Roboto font: `https://fonts.gstatic.com/s/roboto/v30/KFOmCnqEu92Fr1Mu5mxKKTU1Kvnz.woff2`
To confirm a successful upload, clicking the URL should initiate a font file download.
#### **2. Select a Template**
Choose a template within the editor that you wish to modify. This template should be compatible with the drag-and-drop functionality.
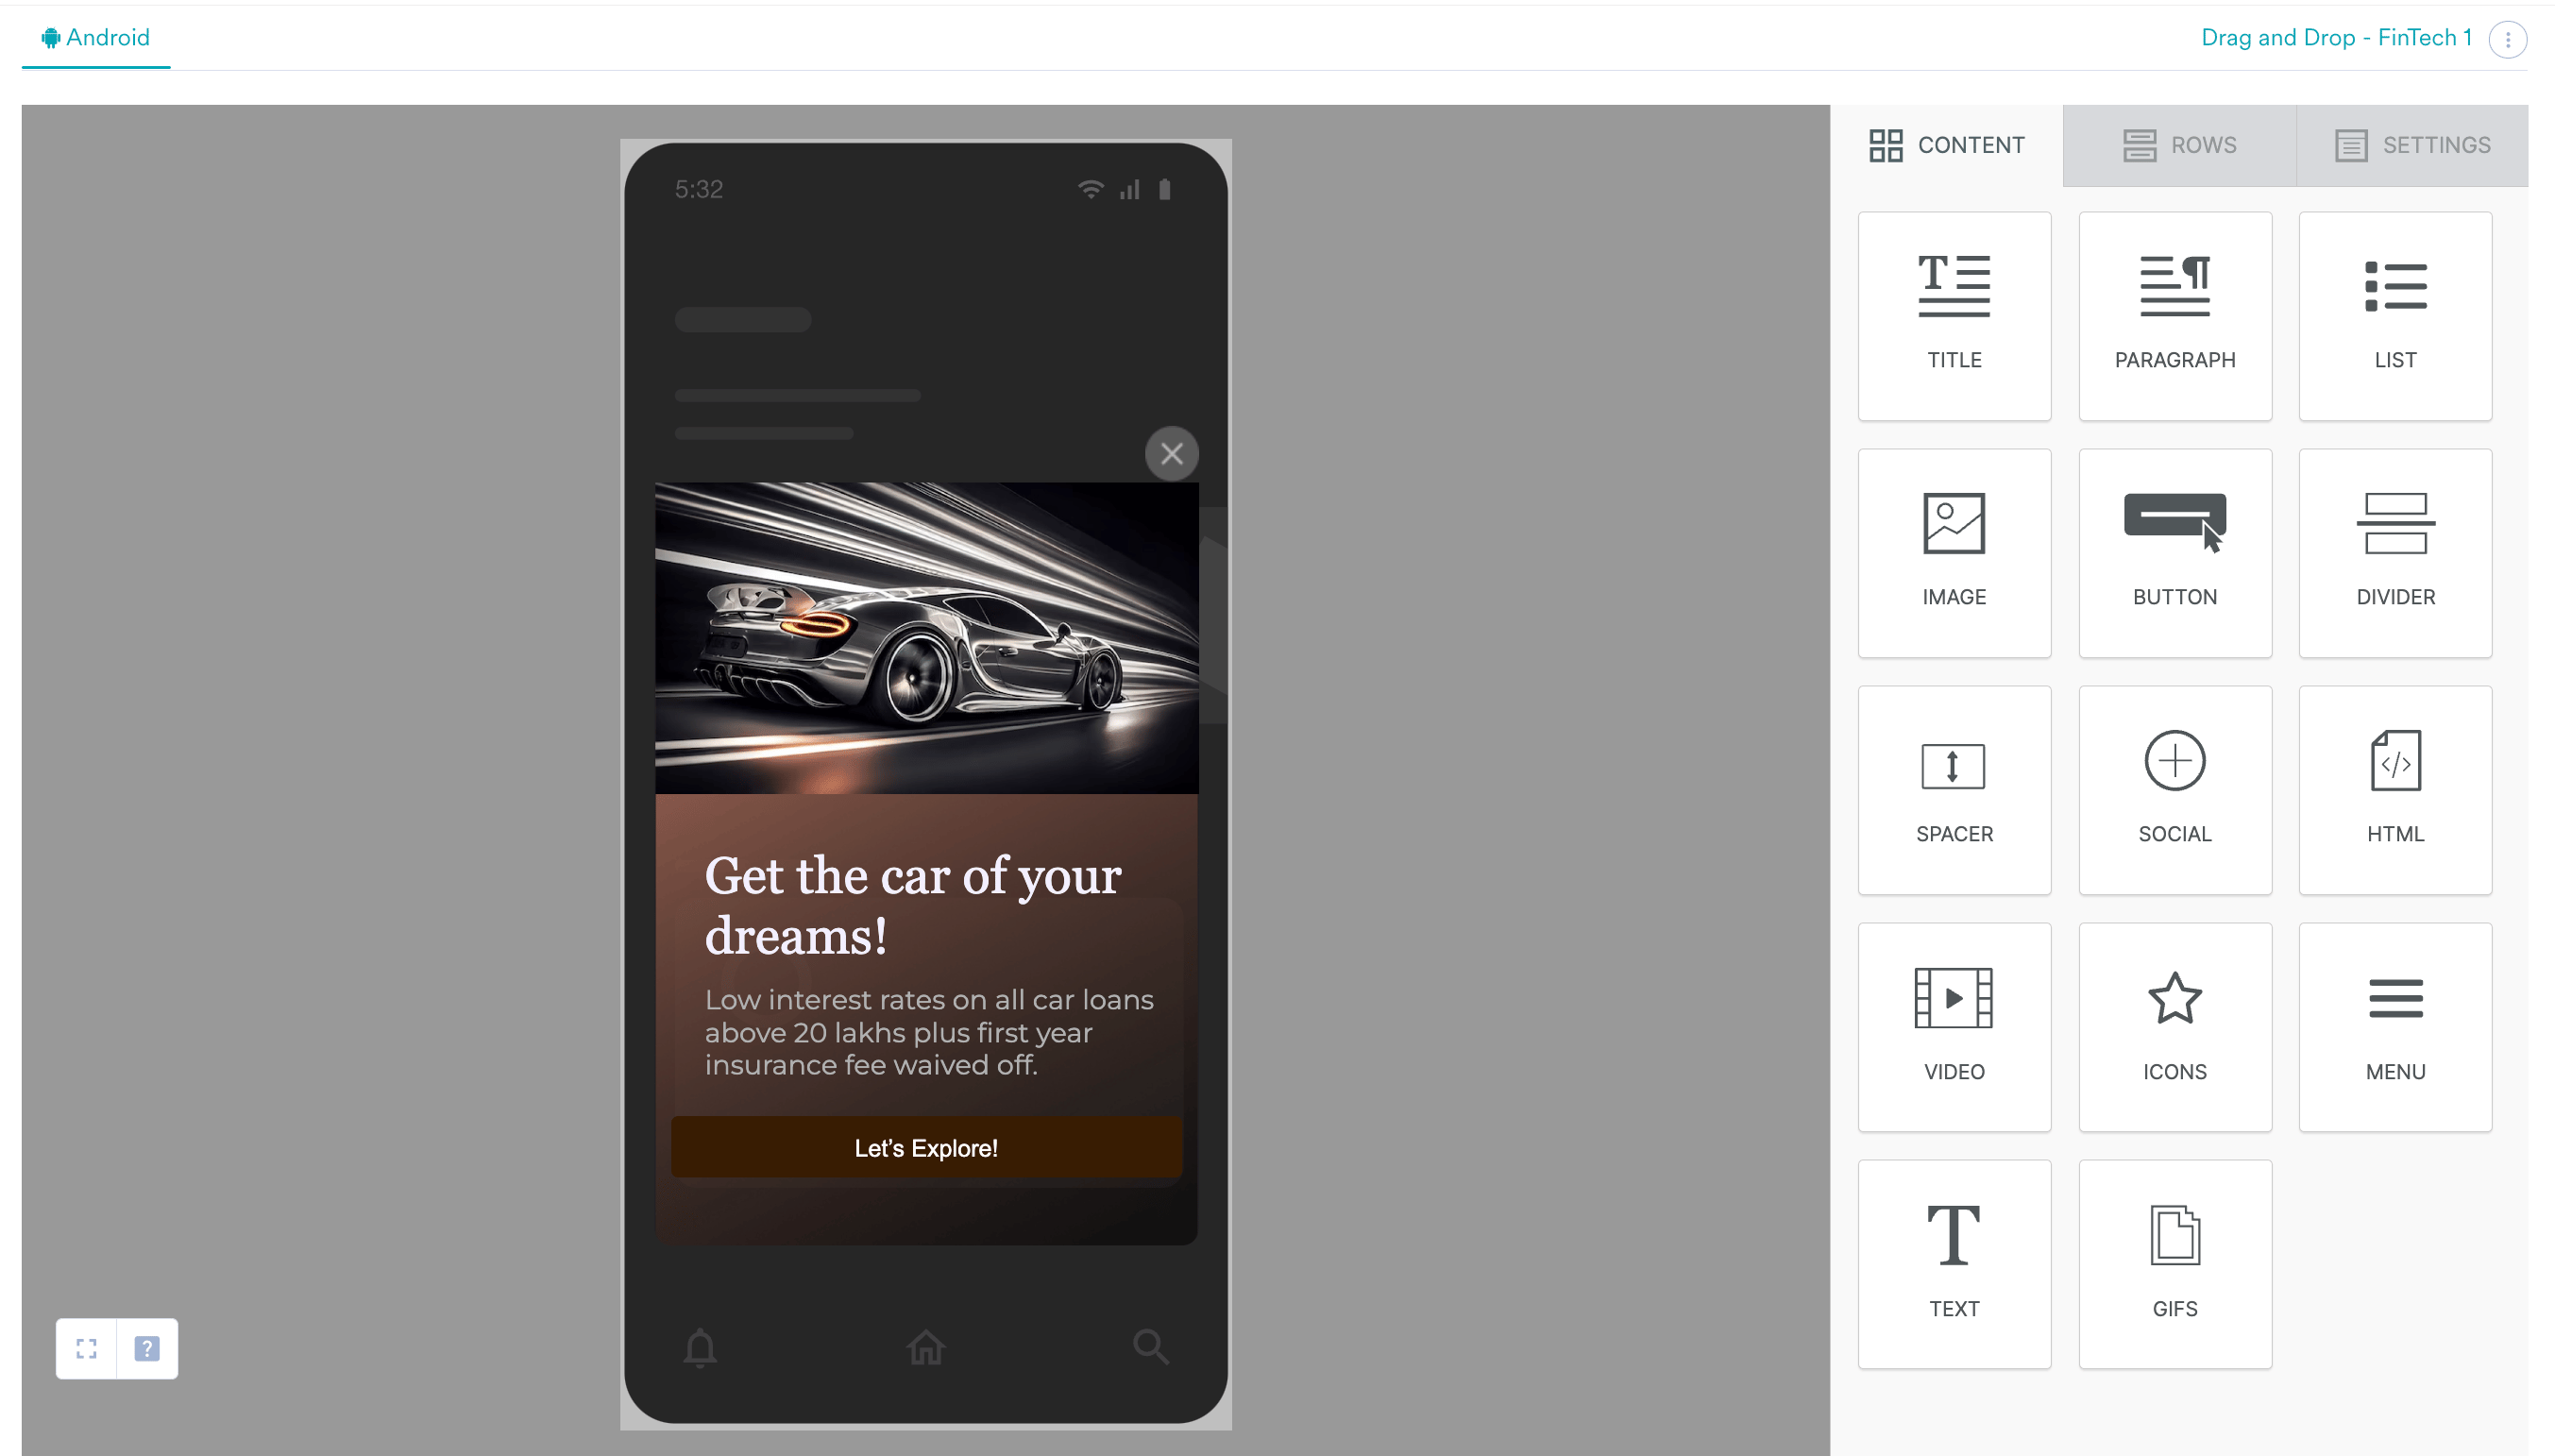
#### **3. Modify Element Identifiers**
Identify the elements (like text or headings) where you want to apply the custom font. Click on the element in the template to open its properties.
* **For a heading element:** Enable the block identifier feature and assign a unique identifier, such as `heading_id`.
* **For a text element:** Similarly, assign a unique identifier like `text_id`.
In this case, we want the same font to be applied to both elements, so we will use the text\_id identifier for both elements.
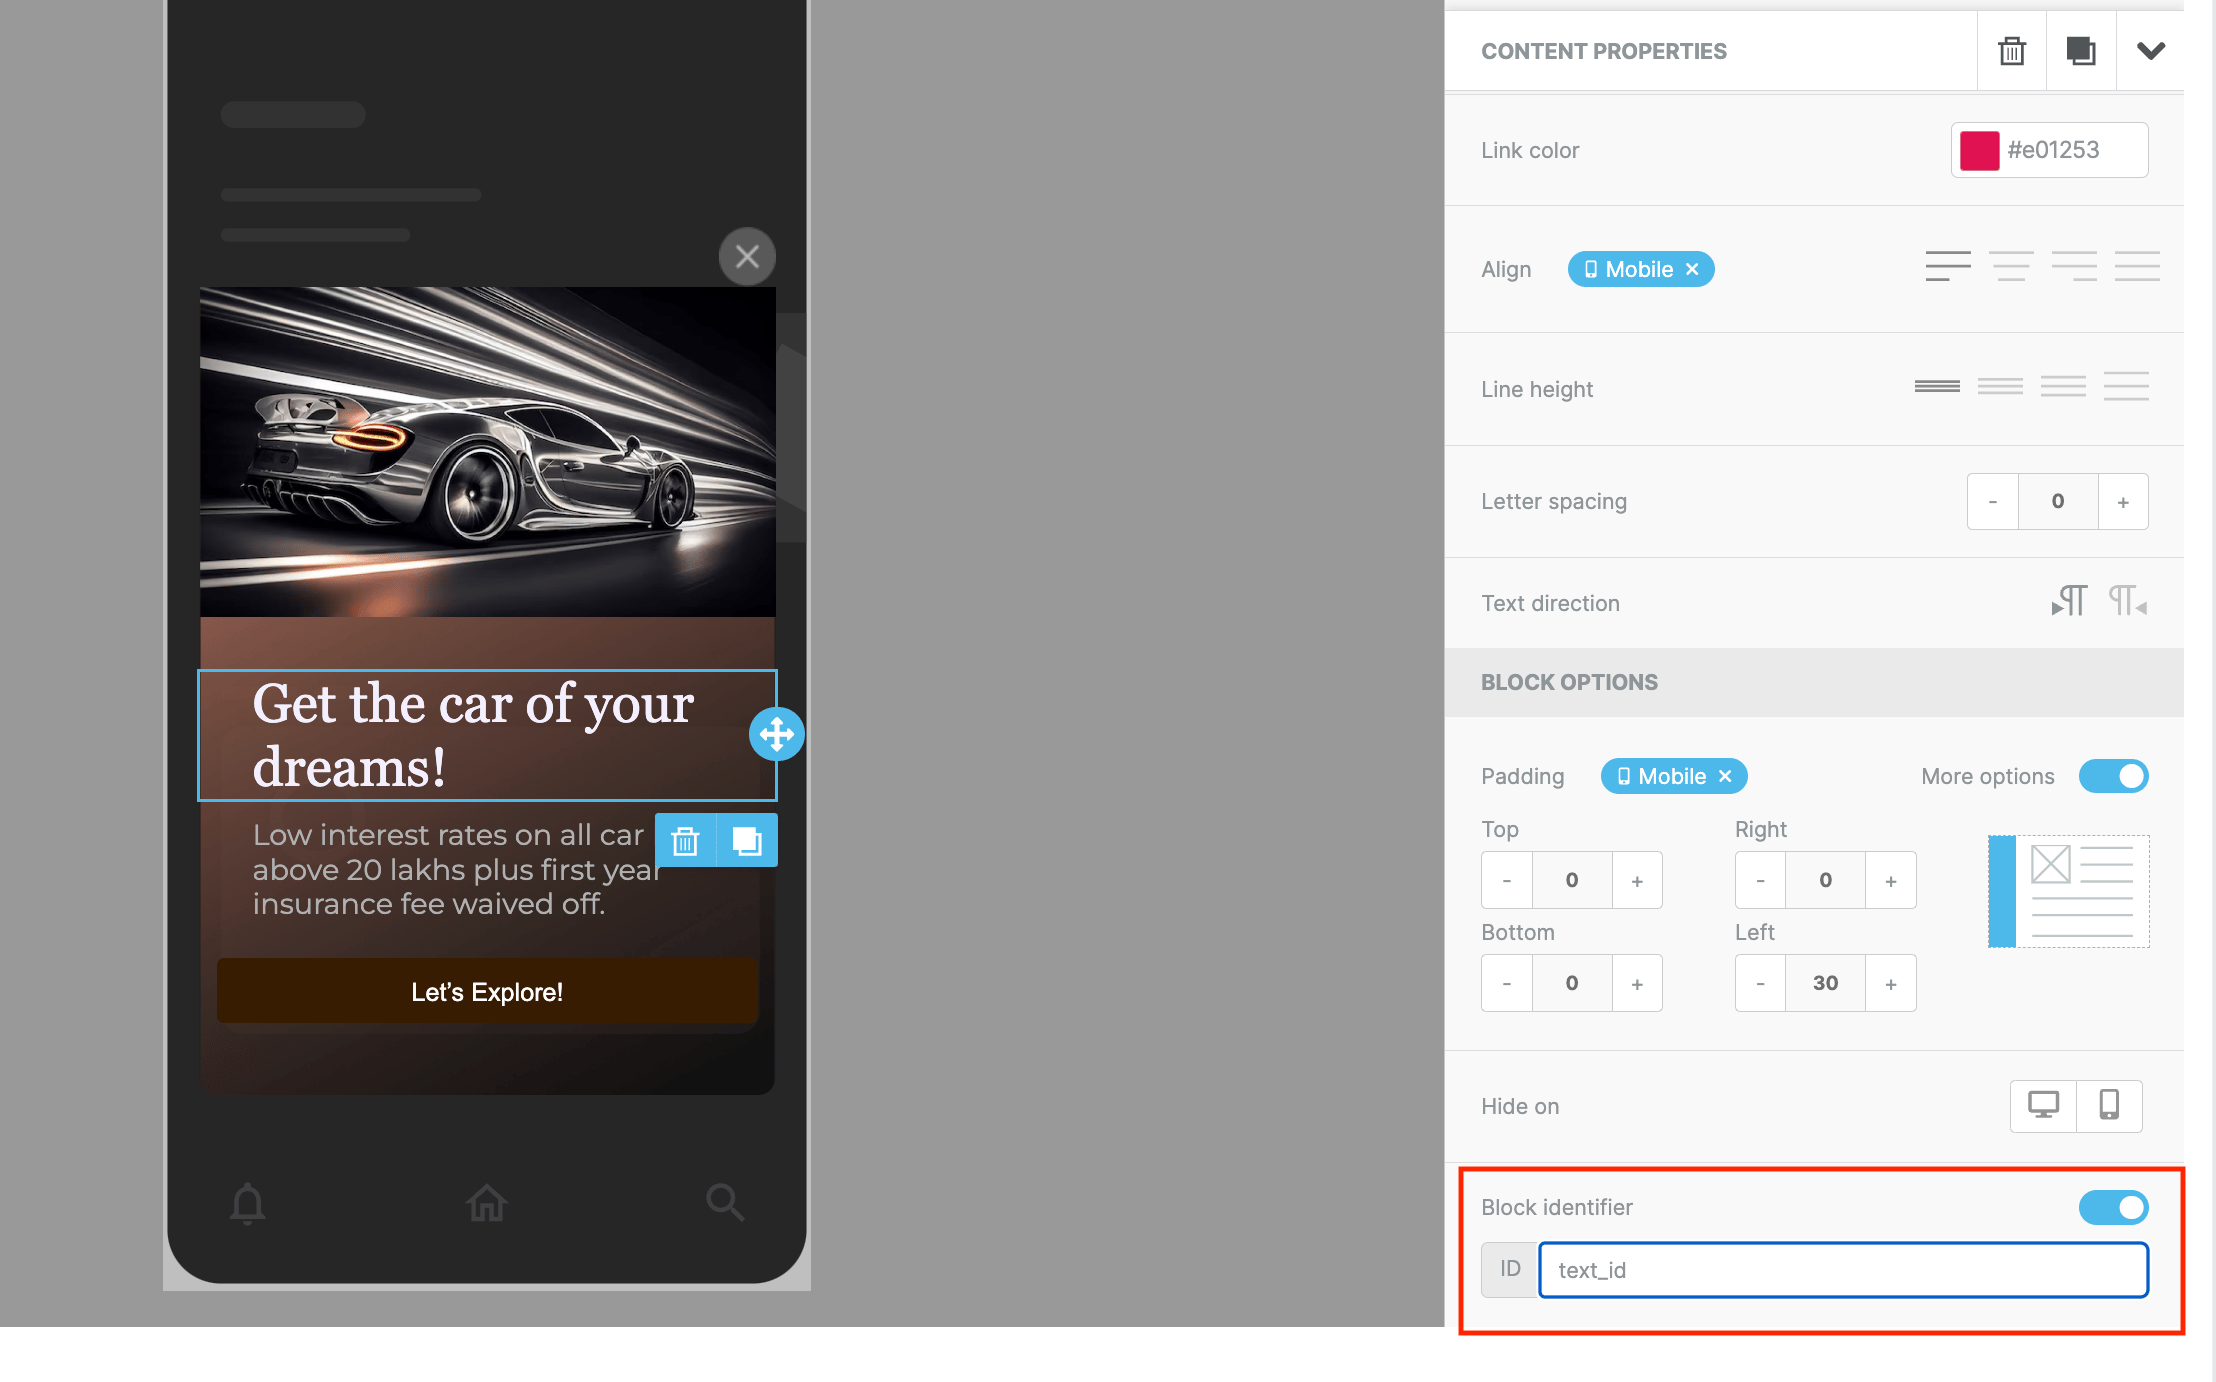
#### **4. Add HTML Content Block**
Drag and drop an HTML content block into your template at the desired location. Note that this HTML element will not be visible to the user and we will use it to only modify the font style within the template.
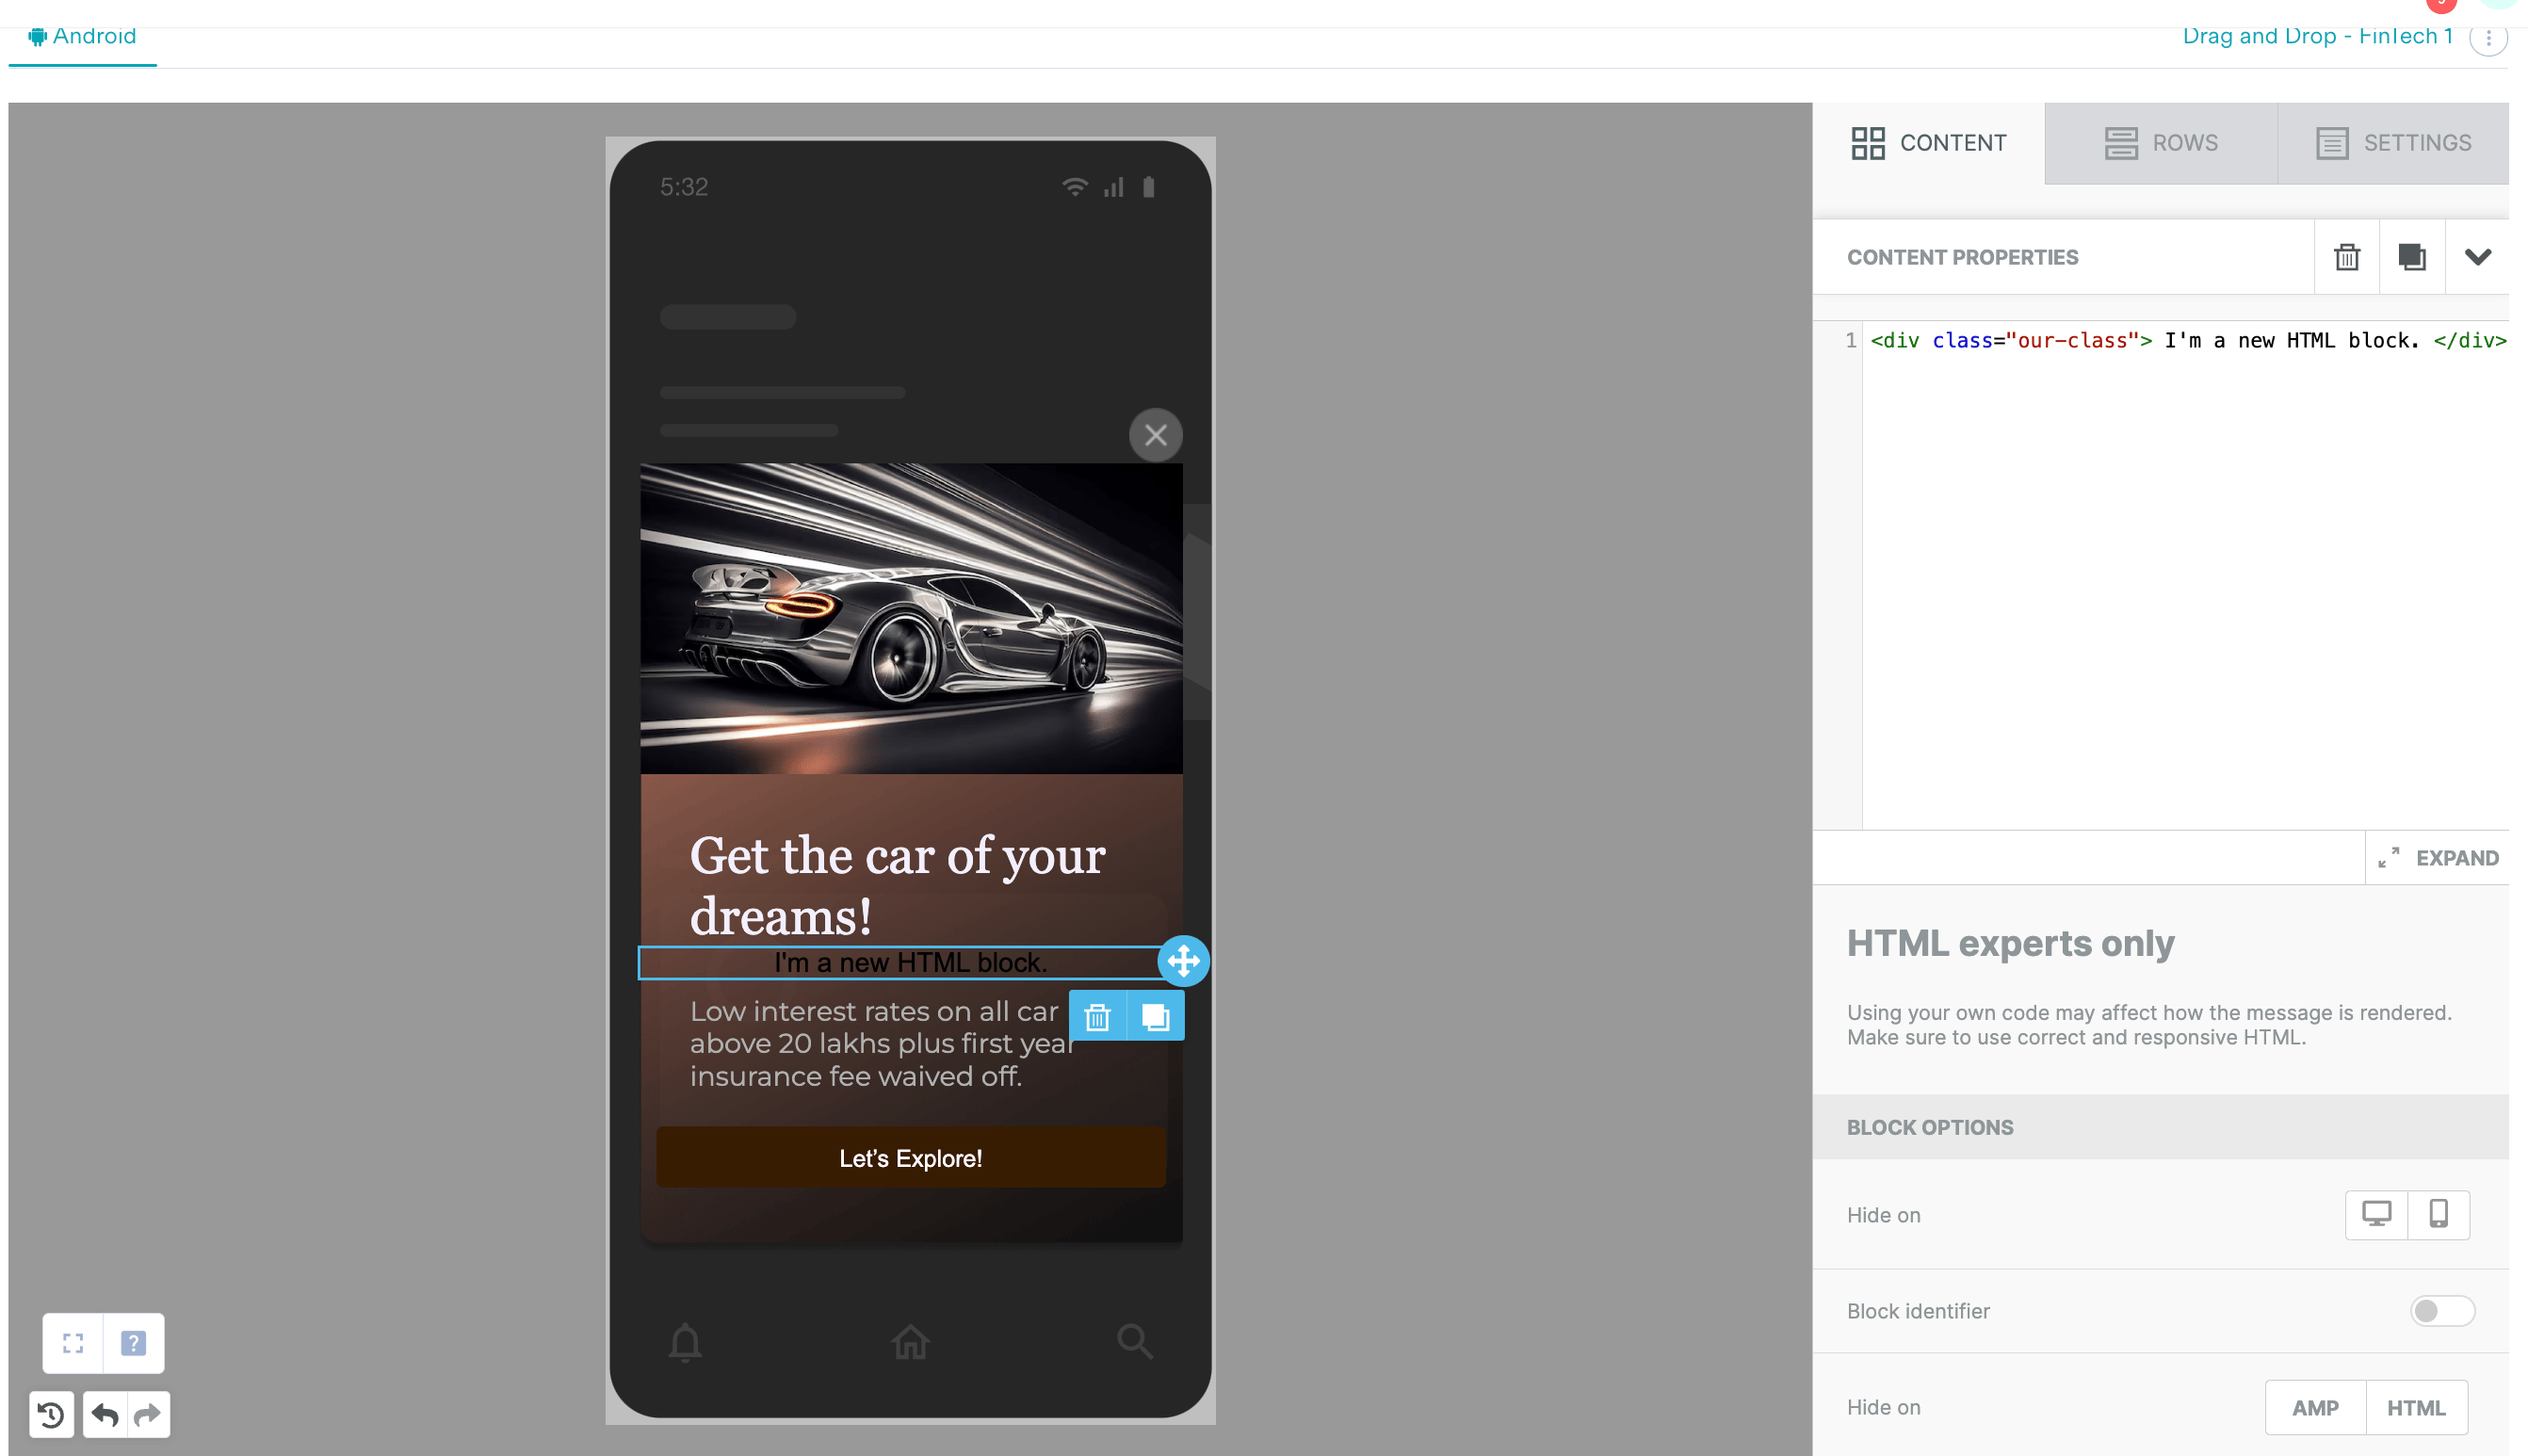
#### **5. Insert Custom Font Code**
Replace the existing code in the HTML content block with the following CSS to define and apply your custom font:
```html wrap theme={null}
```
This CSS snippet utilizes the `@font-face` rule to define 'customfont' using the font hosted at your provided URL. It then ensures that any paragraph (`p`) or heading (`h1`) within elements with IDs `text_id` will use the custom font.
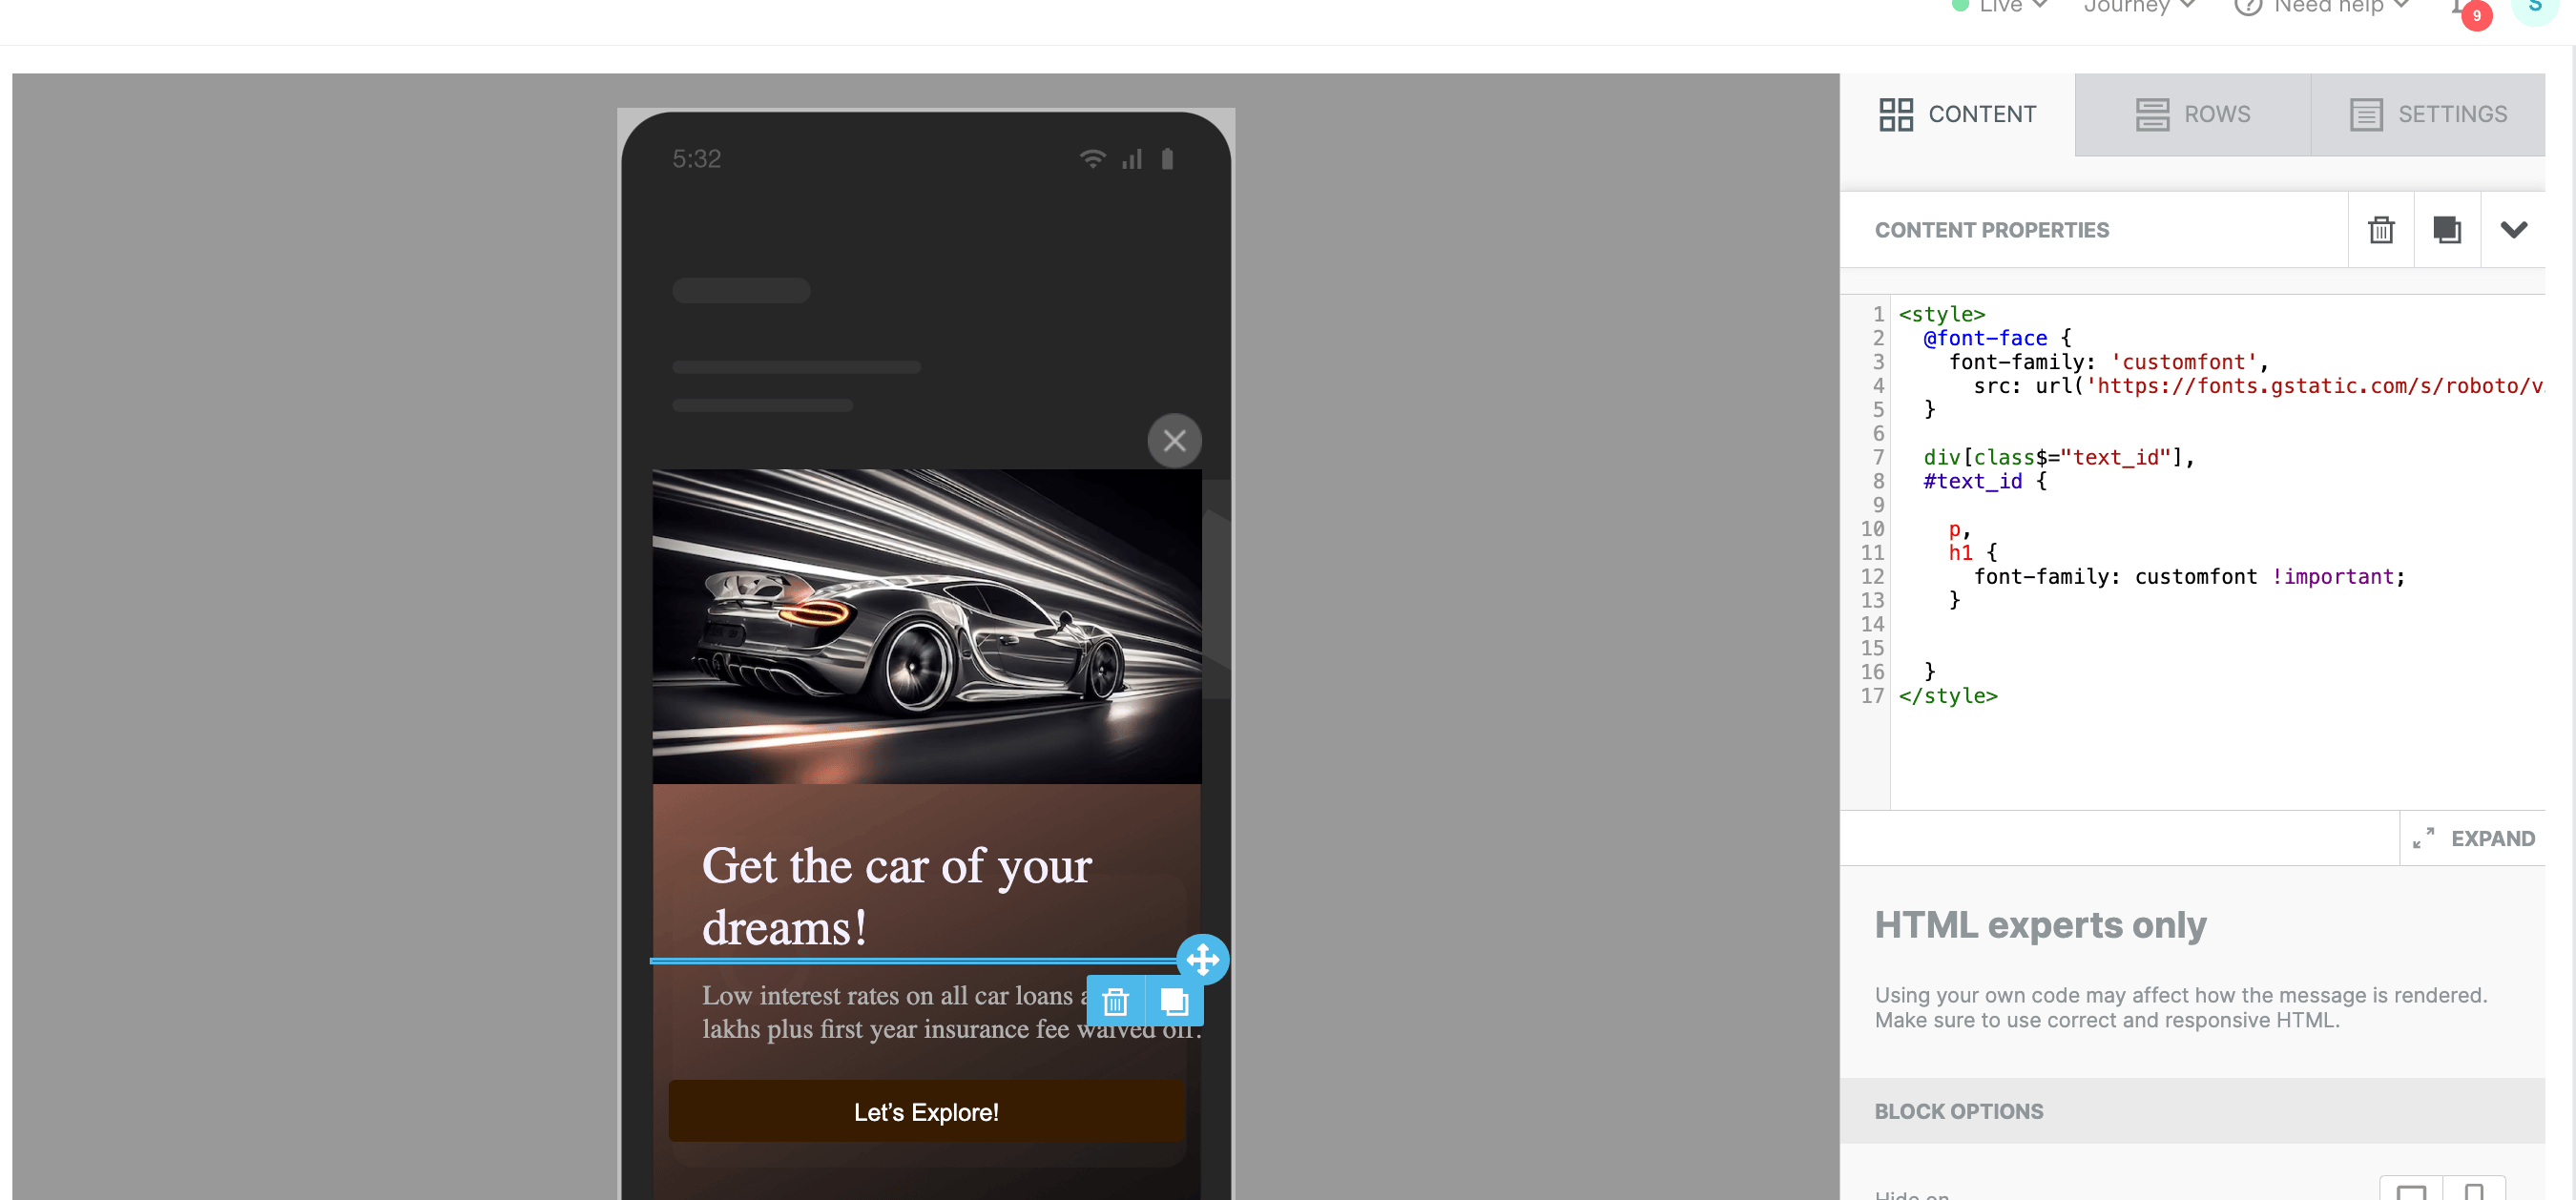
#### **6. Preview and Publish**
Preview the changes in the editor to ensure the custom font is applied correctly. Once satisfied, you can proceed to publish your campaign.
## How to Add a Cross Button to Your Template?
To add a cross button to your template, follow the steps detailed below:
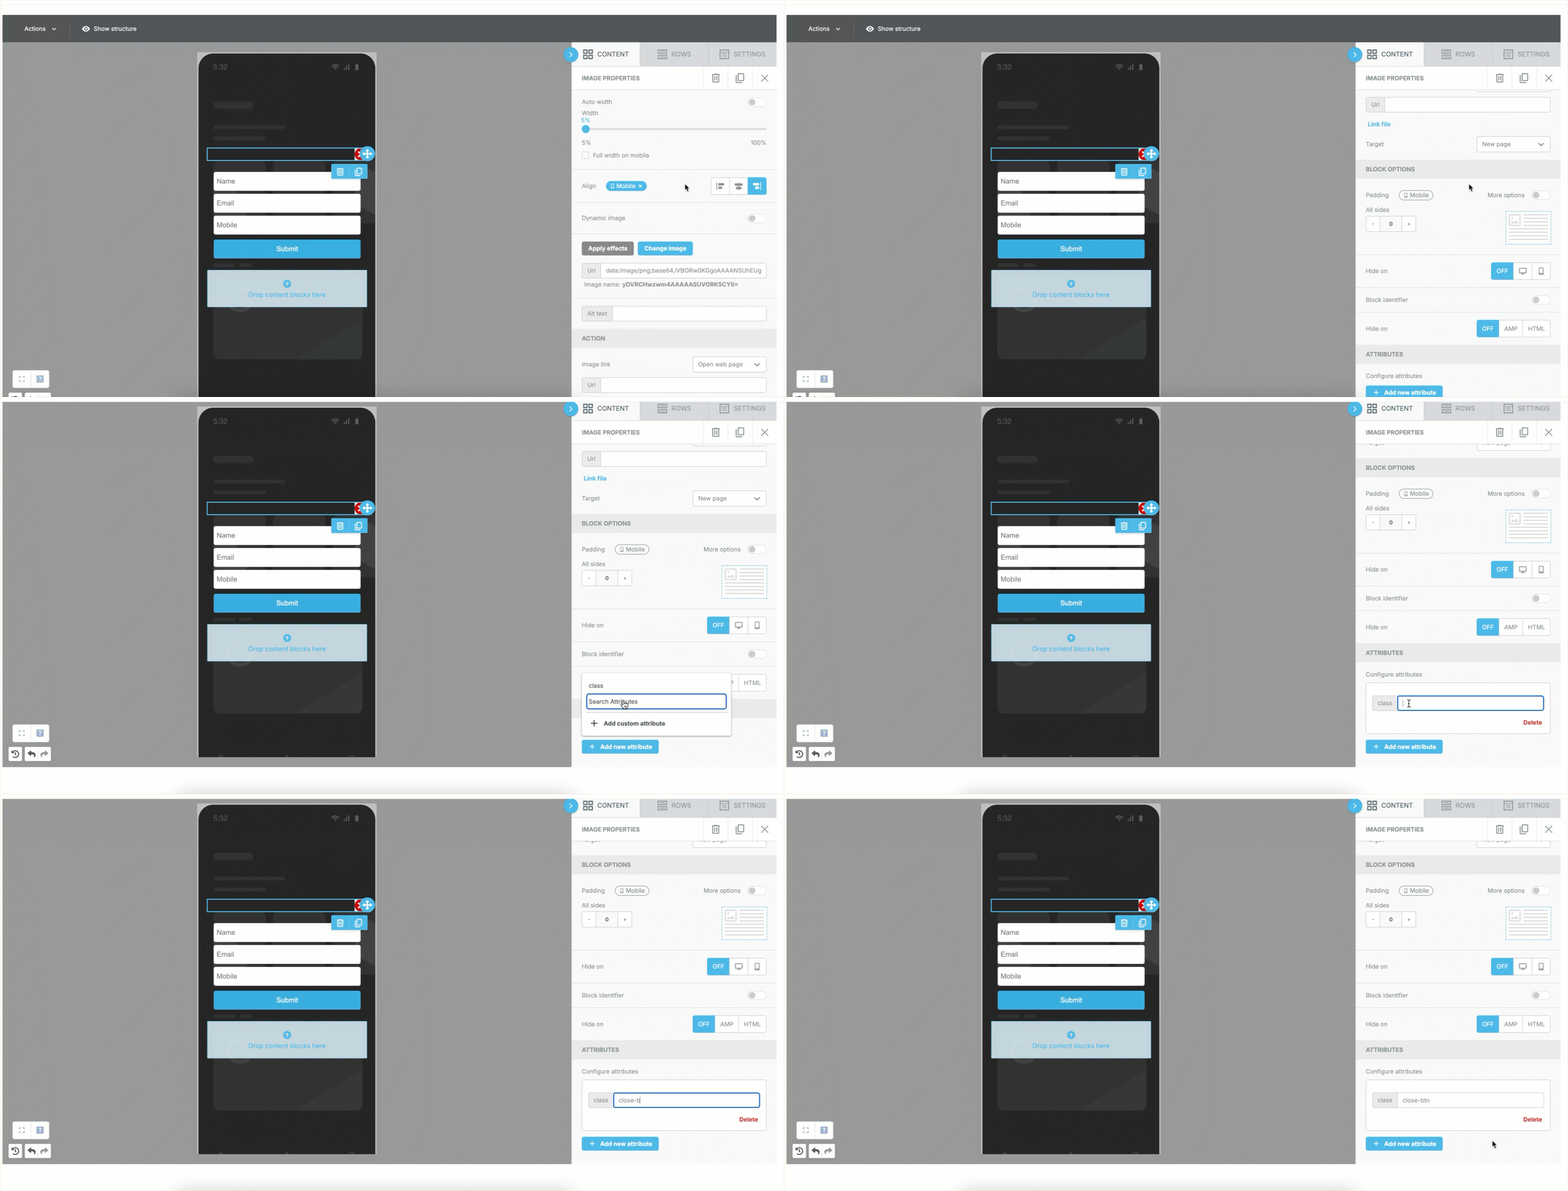
1. Have an image of the cross button available as an URL.
2. Add a new row element and drag and drop the image element as shown below.
3. Click the image element and enter the URL for your image in the **Url** field as shown below.
4. Adjust the image according to your needs.
5. Under the **ATTRIBUTES** section, click **Add new attribute**.
6. Select *class* and set it as *close-btn*.
 ## Video Tutorial
# Start with a blank canvas
When you click on **Start with a blank canvas**, you will get redirected to the Drag and drop editor.
## Video Tutorial
# Start with a blank canvas
When you click on **Start with a blank canvas**, you will get redirected to the Drag and drop editor.
 ## Content
The content section contains all the blocks you can add to your In-app campaign. To get started with your campaign, a row is automatically added where you must add the content blocks.
1. **Title**: The title block lets you add a title text to the campaign. You can change the styling and font of the title by clicking on the **Title block**. This will open a **Content Properties**section on the right-hand side where you can make further modifications.
## Content
The content section contains all the blocks you can add to your In-app campaign. To get started with your campaign, a row is automatically added where you must add the content blocks.
1. **Title**: The title block lets you add a title text to the campaign. You can change the styling and font of the title by clicking on the **Title block**. This will open a **Content Properties**section on the right-hand side where you can make further modifications.  * You can also delete or duplicate the block by clicking on the **Delete** and **Duplicate** icons below the block.
2. **Paragraph**: The paragraph block lets you add text to the campaign. You can make similar modifications to the text here as the title block.
3. **List**: The list block lets you add an unordered list to the campaign. You can make similar modifications to the text here as the title block.
4. **Image**: The image block lets you add an image to the campaign. You can either drag and drop an image on the block or click on **Browse**and upload a new image.
* You can also delete or duplicate the block by clicking on the **Delete** and **Duplicate** icons below the block.
2. **Paragraph**: The paragraph block lets you add text to the campaign. You can make similar modifications to the text here as the title block.
3. **List**: The list block lets you add an unordered list to the campaign. You can make similar modifications to the text here as the title block.
4. **Image**: The image block lets you add an image to the campaign. You can either drag and drop an image on the block or click on **Browse**and upload a new image.  * After adding your image, you can modify its width and alignment from the editor on the right-hand side. You can also click on **Apply Effect**to filter, resize, crop, or do more with your image.
* You can add links to your image and enable click tracking on it by using attributes.
5. **Button**: The button block lets you add a button to the campaign. You can style the buttons and add actions to them as well. Drag and drop the button to the screen and click on it to get the edit options.
6. **Divider**: The divider block can be used to add a divider between two other content blocks or rows. You can modify the width and styling of the divider in the content properties section.
7. **Spacer**: The spacer block can be placed between two content blocks or rows to add some separation between the two.
8. **Social**: The social block lets you add social media links to your campaign. You can add the relevant URLs in the content properties section on the right-hand side of the editor.
* After adding your image, you can modify its width and alignment from the editor on the right-hand side. You can also click on **Apply Effect**to filter, resize, crop, or do more with your image.
* You can add links to your image and enable click tracking on it by using attributes.
5. **Button**: The button block lets you add a button to the campaign. You can style the buttons and add actions to them as well. Drag and drop the button to the screen and click on it to get the edit options.
6. **Divider**: The divider block can be used to add a divider between two other content blocks or rows. You can modify the width and styling of the divider in the content properties section.
7. **Spacer**: The spacer block can be placed between two content blocks or rows to add some separation between the two.
8. **Social**: The social block lets you add social media links to your campaign. You can add the relevant URLs in the content properties section on the right-hand side of the editor.  * You can also click on **New Element** in the content properties section to add any other social media links that you might want to include in the campaign.
9. **HTML**: The HTML block lets you add custom HTML to your campaign.
10. **Video**: The video block lets you add a video to your campaign. You can upload a YouTube video, a Vimeo video, or a URL for a video.
11. **Icons**: The icon block lets you add an icon to your campaign. You can click on **Apply Effects**in the content properties section to filter, resize, crop, or do more with your icon.
* You can also click on **New Element** in the content properties section to add any other social media links that you might want to include in the campaign.
9. **HTML**: The HTML block lets you add custom HTML to your campaign.
10. **Video**: The video block lets you add a video to your campaign. You can upload a YouTube video, a Vimeo video, or a URL for a video.
11. **Icons**: The icon block lets you add an icon to your campaign. You can click on **Apply Effects**in the content properties section to filter, resize, crop, or do more with your icon.  * Other than changing the icon image itself, you can also modify the URL of the icon and some text to the icon by enabling the **More options** button.
12. **Menu**: The menu block allows you to create a menu in your campaign. You can add multiple items here and modify them in the content properties section.
13. **Text**: The text block lets you add text to your campaign. You can edit the text directly inside the text block, and you can add font and styling options to it by clicking on the text block and accessing the editor above it.
14. **GIFs**: The GIFs block lets you add a video to your campaign. You can search for GIFs with Giphy and select the GIF that you want to add.
15. **Form**: The Form box allows you to add a form to your campaign to collect user information within your app. To learn more, see [Add Forms to your In-app Campaign](/user-guide/campaigns-and-channels/in-app-message/templates/drag-and-drop-editor/add-forms-to-your-in-app-campaign).
* Other than changing the icon image itself, you can also modify the URL of the icon and some text to the icon by enabling the **More options** button.
12. **Menu**: The menu block allows you to create a menu in your campaign. You can add multiple items here and modify them in the content properties section.
13. **Text**: The text block lets you add text to your campaign. You can edit the text directly inside the text block, and you can add font and styling options to it by clicking on the text block and accessing the editor above it.
14. **GIFs**: The GIFs block lets you add a video to your campaign. You can search for GIFs with Giphy and select the GIF that you want to add.
15. **Form**: The Form box allows you to add a form to your campaign to collect user information within your app. To learn more, see [Add Forms to your In-app Campaign](/user-guide/campaigns-and-channels/in-app-message/templates/drag-and-drop-editor/add-forms-to-your-in-app-campaign).
 2. You can also use the **Auto width** section under **Content Properties**to modify your In-app campaign for landscape mode.
* Select the **Full width on mobile**checkbox if you want the element to cover the width of the screen in portrait mode.
* You can then modify the width of the content block on landscape mode by using the slider.
* Alternatively, you can also select the **Auto width**option which fixes the width of the content block automatically.
2. You can also use the **Auto width** section under **Content Properties**to modify your In-app campaign for landscape mode.
* Select the **Full width on mobile**checkbox if you want the element to cover the width of the screen in portrait mode.
* You can then modify the width of the content block on landscape mode by using the slider.
* Alternatively, you can also select the **Auto width**option which fixes the width of the content block automatically. 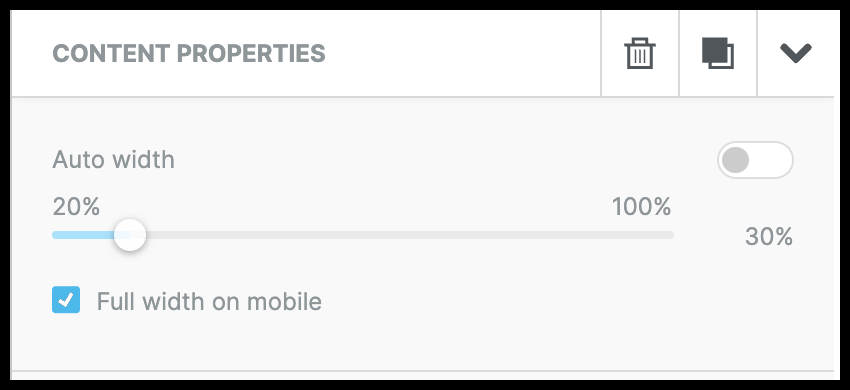 ## Attributes
You can add **attributes** to images, videos, buttons, and GIFs. To do so, scroll down in the **Content Properties** section on the right-hand side of the editor and click on **+ Add New Attribute**. You can either search from the attributes provided to you or add your own custom attributes.
## Attributes
You can add **attributes** to images, videos, buttons, and GIFs. To do so, scroll down in the **Content Properties** section on the right-hand side of the editor and click on **+ Add New Attribute**. You can either search from the attributes provided to you or add your own custom attributes.
 The list of attributes provided by MoEngage is:
1. **Navigation**: This action will allow you to open a webpage inside your app in web view when your users click on the content block you assigned this attribute to.
The list of attributes provided by MoEngage is:
1. **Navigation**: This action will allow you to open a webpage inside your app in web view when your users click on the content block you assigned this attribute to. 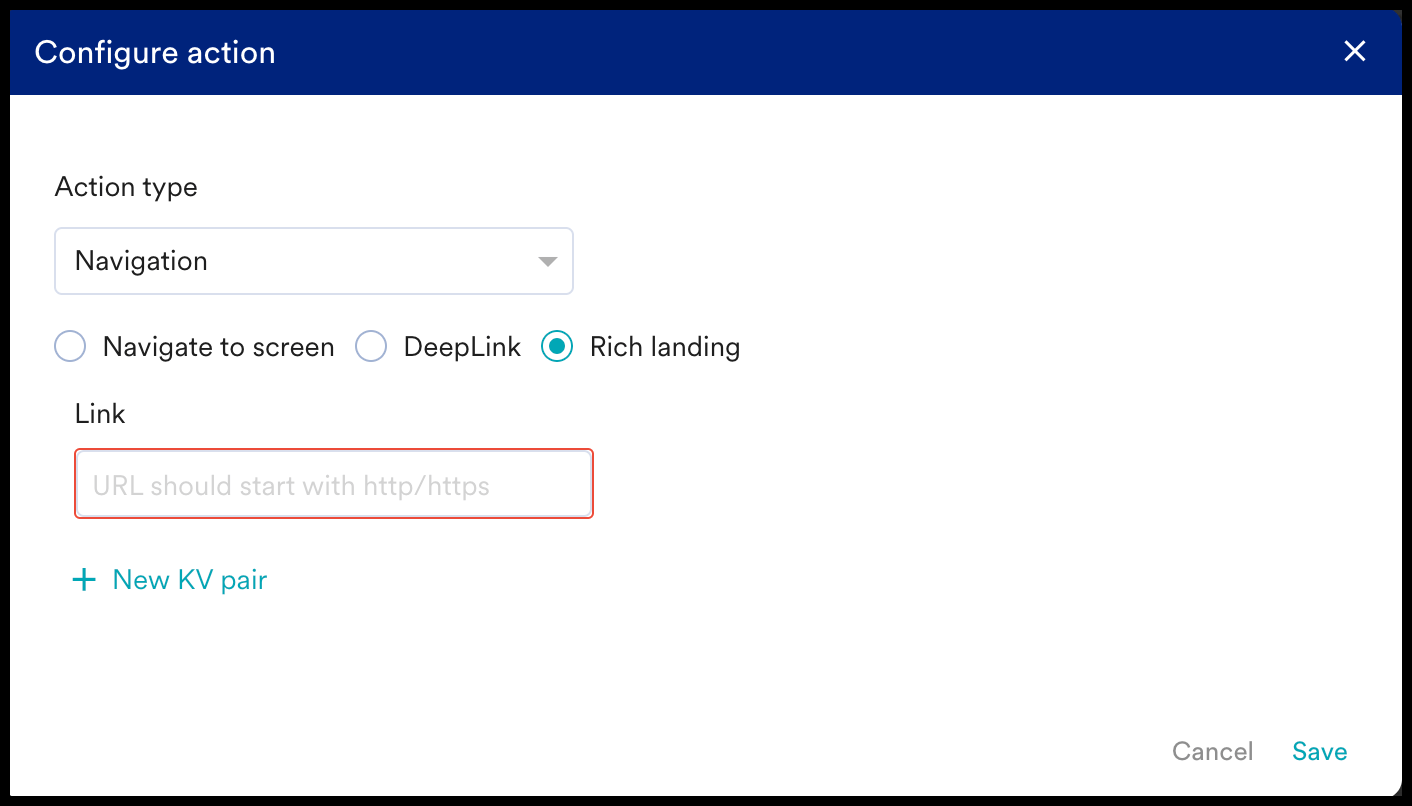 2. **Track Event**: This action allows you to track an event on click of the In-app message and also track an event attribute along with this.
 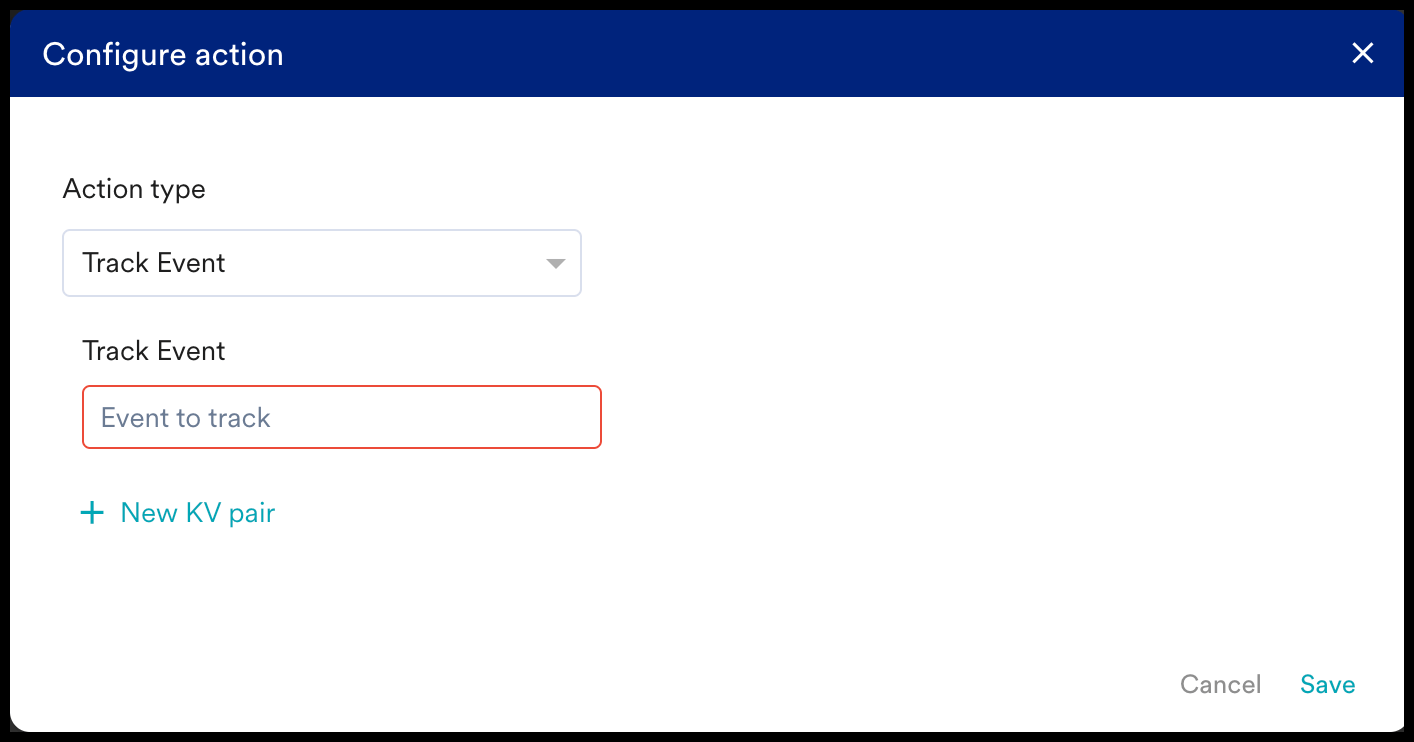 3. **Set User Attribute**: This action will assign a value of your choice to any user attribute that you want to modify. As soon as the user clicks on a content block with this attribute, the user attribute that you chose will be set as the value you entered.
  4. **Copy Coupon Code**: This action allows you to add a Coupon code to a content block. When the user clicks on the content block, the coupon code will get copied in their keyboard. You can also add some personalization to this attribute.
  5. **Call**: You can now call a user as soon as they click on on the content block you assigned this attribute to. Enter the *Mobile No.* to do so.
  6. **SMS**: You can send a message to the user as soon as they click on your message. Enter the *Mobile No*. and the *Message* content to send your SMS.
  7. **Custom Action**: You can also define custom actions in your mobile app which can then be executed when the user clicks on the In-app campaign.
  8. **Navigate to Notification Settings**: When a user clicks on the content block with this attribute, they will be redirected to their notification settings for your app.
 # Explore pre-built templates
To find the pre-built templates for **drag and drop editor**, you can either click on **Explore pre-built templates** or find them through the filter.
* Search: Search for **Drag and drop** in the **Search templates**section.
# Explore pre-built templates
To find the pre-built templates for **drag and drop editor**, you can either click on **Explore pre-built templates** or find them through the filter.
* Search: Search for **Drag and drop** in the **Search templates**section. 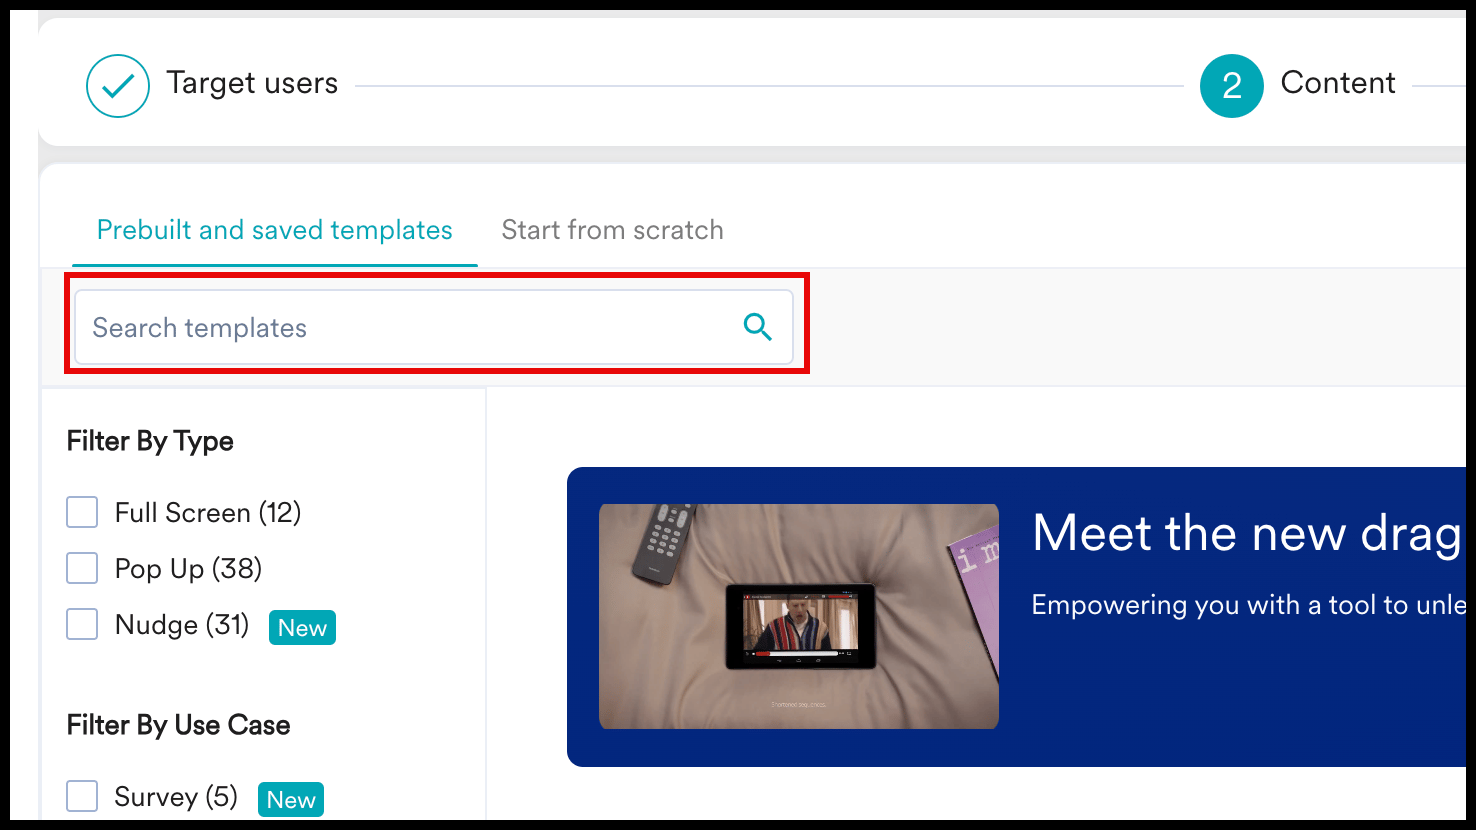 * **Filter By Editor**: Select the **Drag and drop**checkbox and view the available templates.
 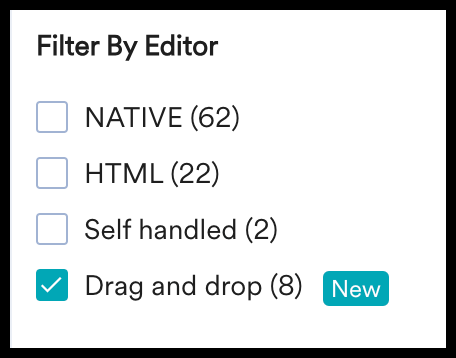 You can customize all of the blocks on the pre-built templates and create your In-app campaign.
## Templates
You can save, change, or reset a template by clicking on the **menu** icon on the top right-hand side of the editor. When you click on **Change template**, you will be redirected to the template selection menu where you can choose to work with a blank canvas or use one of MoEngage's prebuilt templates.
You can customize all of the blocks on the pre-built templates and create your In-app campaign.
## Templates
You can save, change, or reset a template by clicking on the **menu** icon on the top right-hand side of the editor. When you click on **Change template**, you will be redirected to the template selection menu where you can choose to work with a blank canvas or use one of MoEngage's prebuilt templates.

 # FAQs
## How to Use Custom Fonts in the In-App Drag and Drop Editor?
To incorporate custom fonts into your templates using MoEngage's in-app drag and drop editor, follow these detailed steps:
#### **1. Host Your Font File**
First, ensure that your custom font file is hosted on a secure domain or a publicly accessible URL. For example, you can use a URL like `https://yourdomain.com/fonts/yourfont.ttf`.
For demonstration purposes, here's a sample link to the Roboto font: `https://fonts.gstatic.com/s/roboto/v30/KFOmCnqEu92Fr1Mu5mxKKTU1Kvnz.woff2`
To confirm a successful upload, clicking the URL should initiate a font file download.
#### **2. Select a Template**
Choose a template within the editor that you wish to modify. This template should be compatible with the drag-and-drop functionality.
# FAQs
## How to Use Custom Fonts in the In-App Drag and Drop Editor?
To incorporate custom fonts into your templates using MoEngage's in-app drag and drop editor, follow these detailed steps:
#### **1. Host Your Font File**
First, ensure that your custom font file is hosted on a secure domain or a publicly accessible URL. For example, you can use a URL like `https://yourdomain.com/fonts/yourfont.ttf`.
For demonstration purposes, here's a sample link to the Roboto font: `https://fonts.gstatic.com/s/roboto/v30/KFOmCnqEu92Fr1Mu5mxKKTU1Kvnz.woff2`
To confirm a successful upload, clicking the URL should initiate a font file download.
#### **2. Select a Template**
Choose a template within the editor that you wish to modify. This template should be compatible with the drag-and-drop functionality.
 #### **3. Modify Element Identifiers**
Identify the elements (like text or headings) where you want to apply the custom font. Click on the element in the template to open its properties.
* **For a heading element:** Enable the block identifier feature and assign a unique identifier, such as `heading_id`.
* **For a text element:** Similarly, assign a unique identifier like `text_id`.
In this case, we want the same font to be applied to both elements, so we will use the text\_id identifier for both elements.
#### **3. Modify Element Identifiers**
Identify the elements (like text or headings) where you want to apply the custom font. Click on the element in the template to open its properties.
* **For a heading element:** Enable the block identifier feature and assign a unique identifier, such as `heading_id`.
* **For a text element:** Similarly, assign a unique identifier like `text_id`.
In this case, we want the same font to be applied to both elements, so we will use the text\_id identifier for both elements.
 #### **4. Add HTML Content Block**
Drag and drop an HTML content block into your template at the desired location. Note that this HTML element will not be visible to the user and we will use it to only modify the font style within the template.
#### **4. Add HTML Content Block**
Drag and drop an HTML content block into your template at the desired location. Note that this HTML element will not be visible to the user and we will use it to only modify the font style within the template.
 #### **5. Insert Custom Font Code**
Replace the existing code in the HTML content block with the following CSS to define and apply your custom font:
```html wrap theme={null}
```
This CSS snippet utilizes the `@font-face` rule to define 'customfont' using the font hosted at your provided URL. It then ensures that any paragraph (`p`) or heading (`h1`) within elements with IDs `text_id` will use the custom font.
#### **5. Insert Custom Font Code**
Replace the existing code in the HTML content block with the following CSS to define and apply your custom font:
```html wrap theme={null}
```
This CSS snippet utilizes the `@font-face` rule to define 'customfont' using the font hosted at your provided URL. It then ensures that any paragraph (`p`) or heading (`h1`) within elements with IDs `text_id` will use the custom font.
 #### **6. Preview and Publish**
Preview the changes in the editor to ensure the custom font is applied correctly. Once satisfied, you can proceed to publish your campaign.
## How to Add a Cross Button to Your Template?
To add a cross button to your template, follow the steps detailed below:
1. Have an image of the cross button available as an URL.
2. Add a new row element and drag and drop the image element as shown below.
#### **6. Preview and Publish**
Preview the changes in the editor to ensure the custom font is applied correctly. Once satisfied, you can proceed to publish your campaign.
## How to Add a Cross Button to Your Template?
To add a cross button to your template, follow the steps detailed below:
1. Have an image of the cross button available as an URL.
2. Add a new row element and drag and drop the image element as shown below. 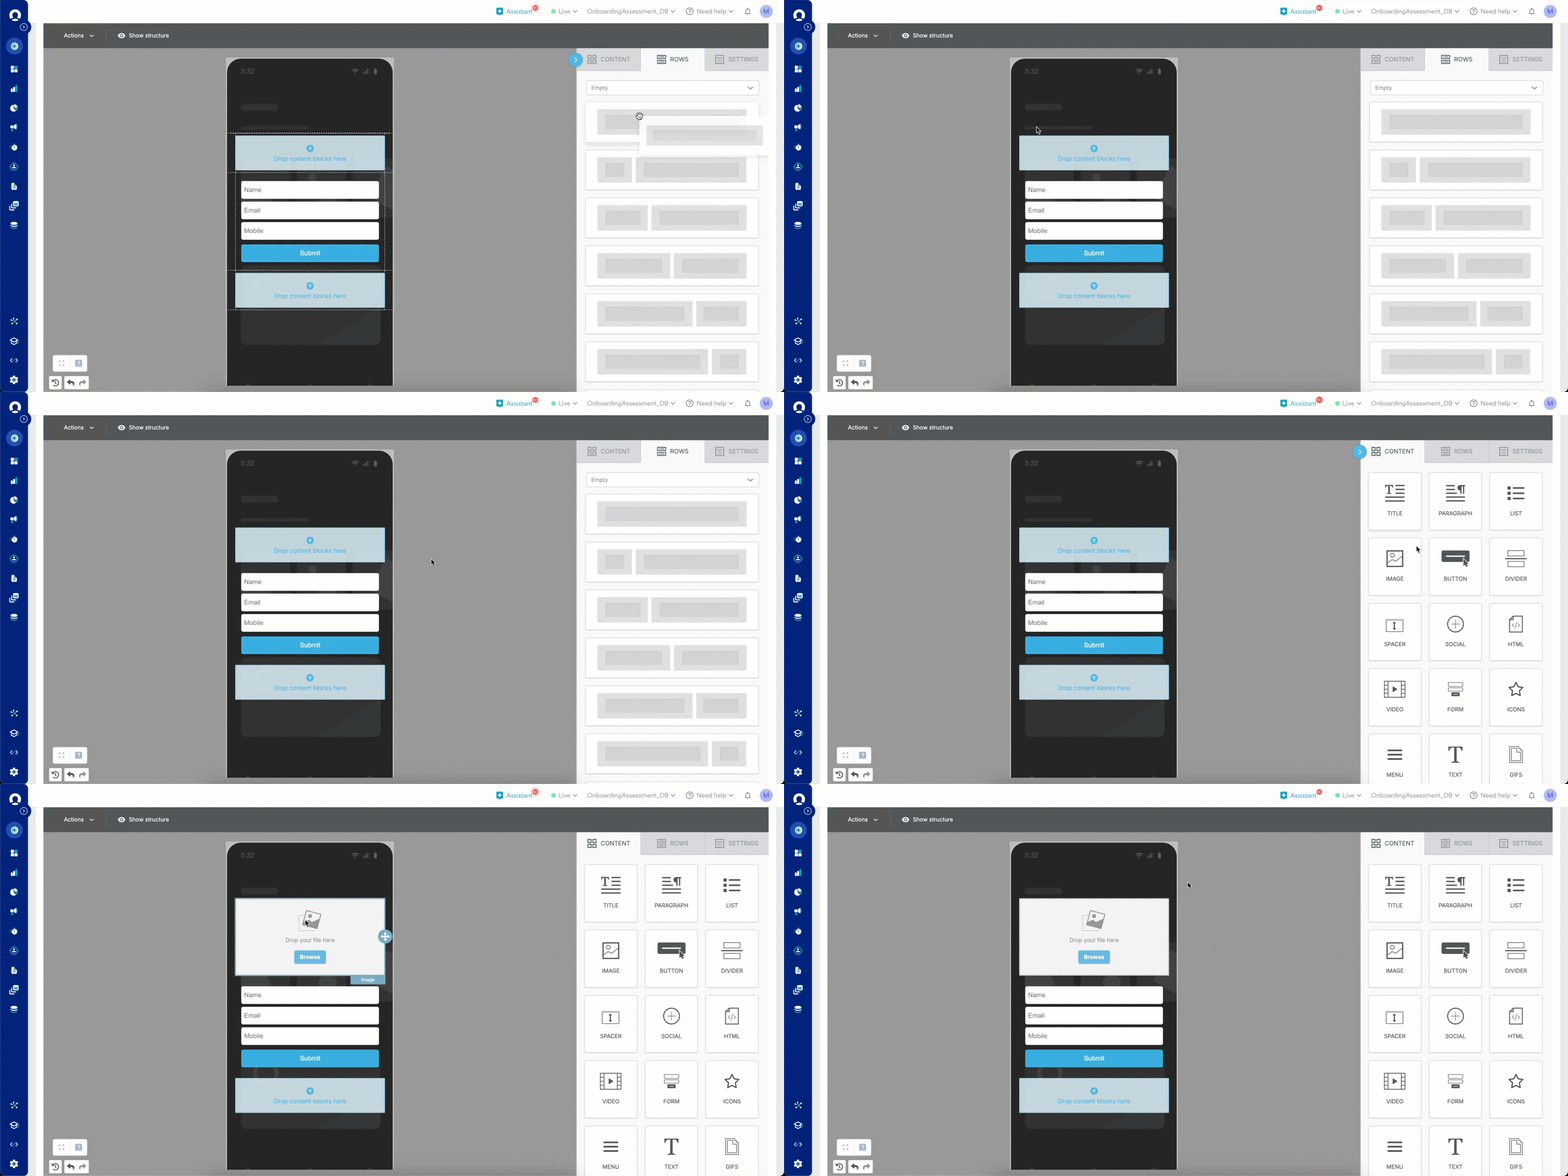 3. Click the image element and enter the URL for your image in the **Url** field as shown below.
 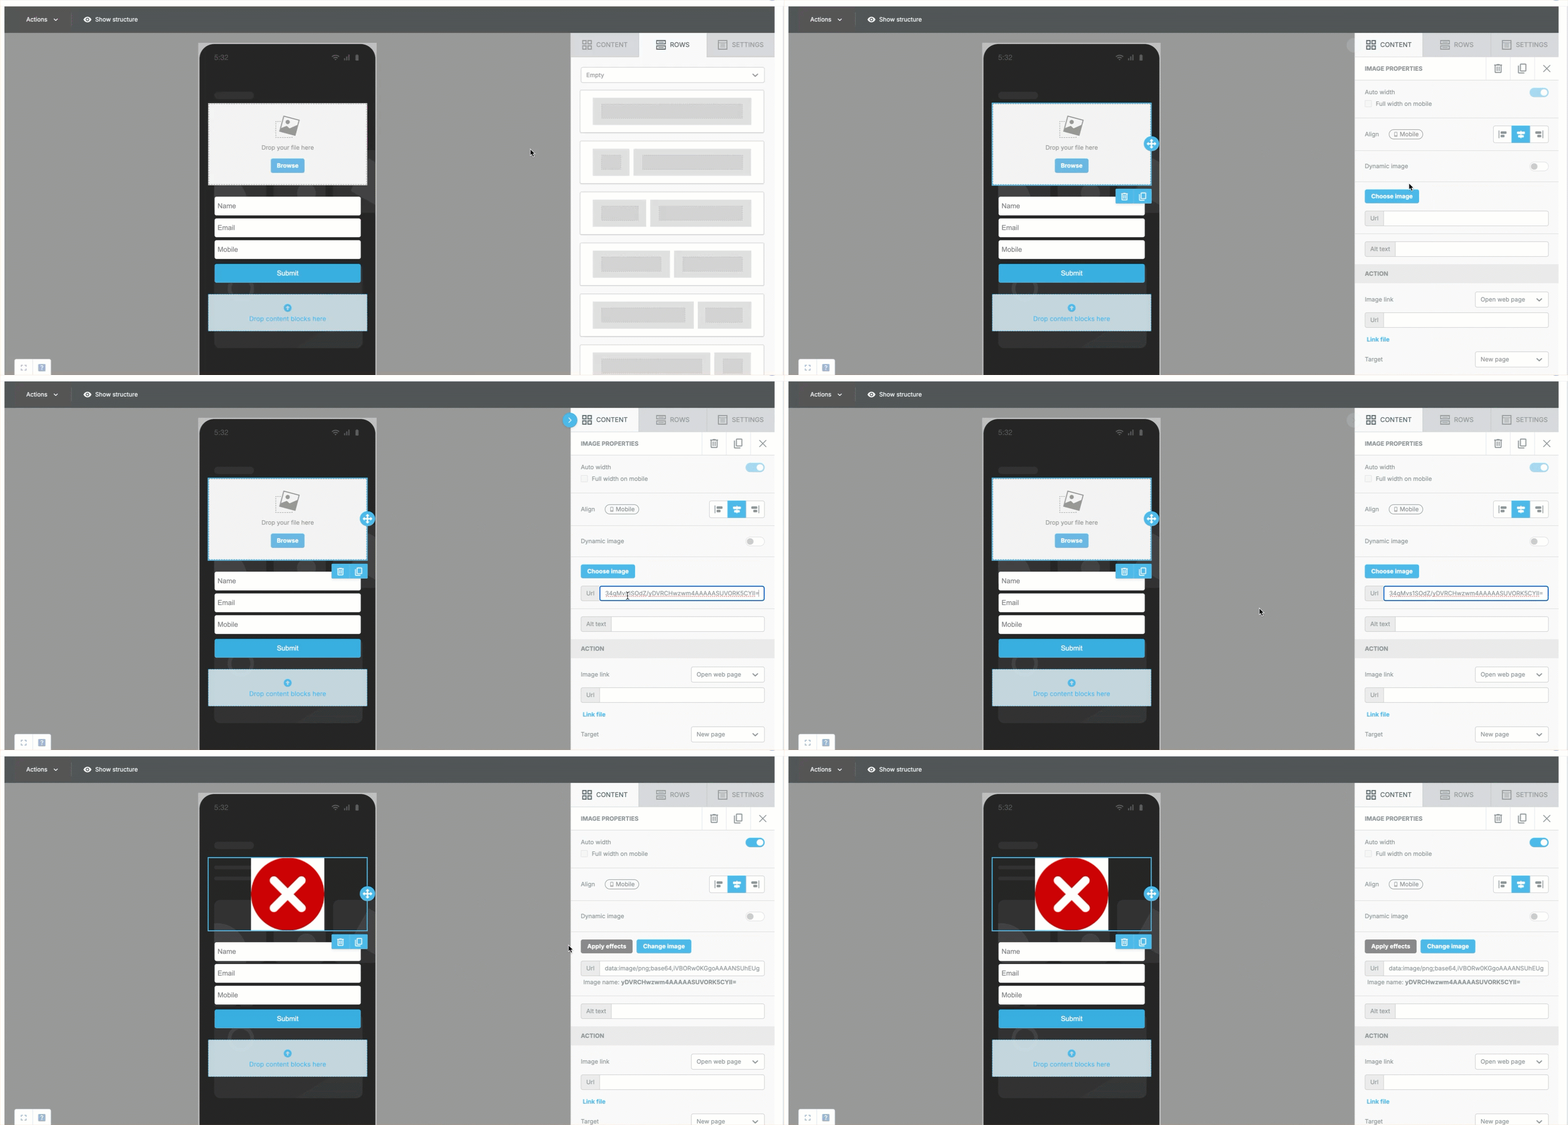 4. Adjust the image according to your needs.
 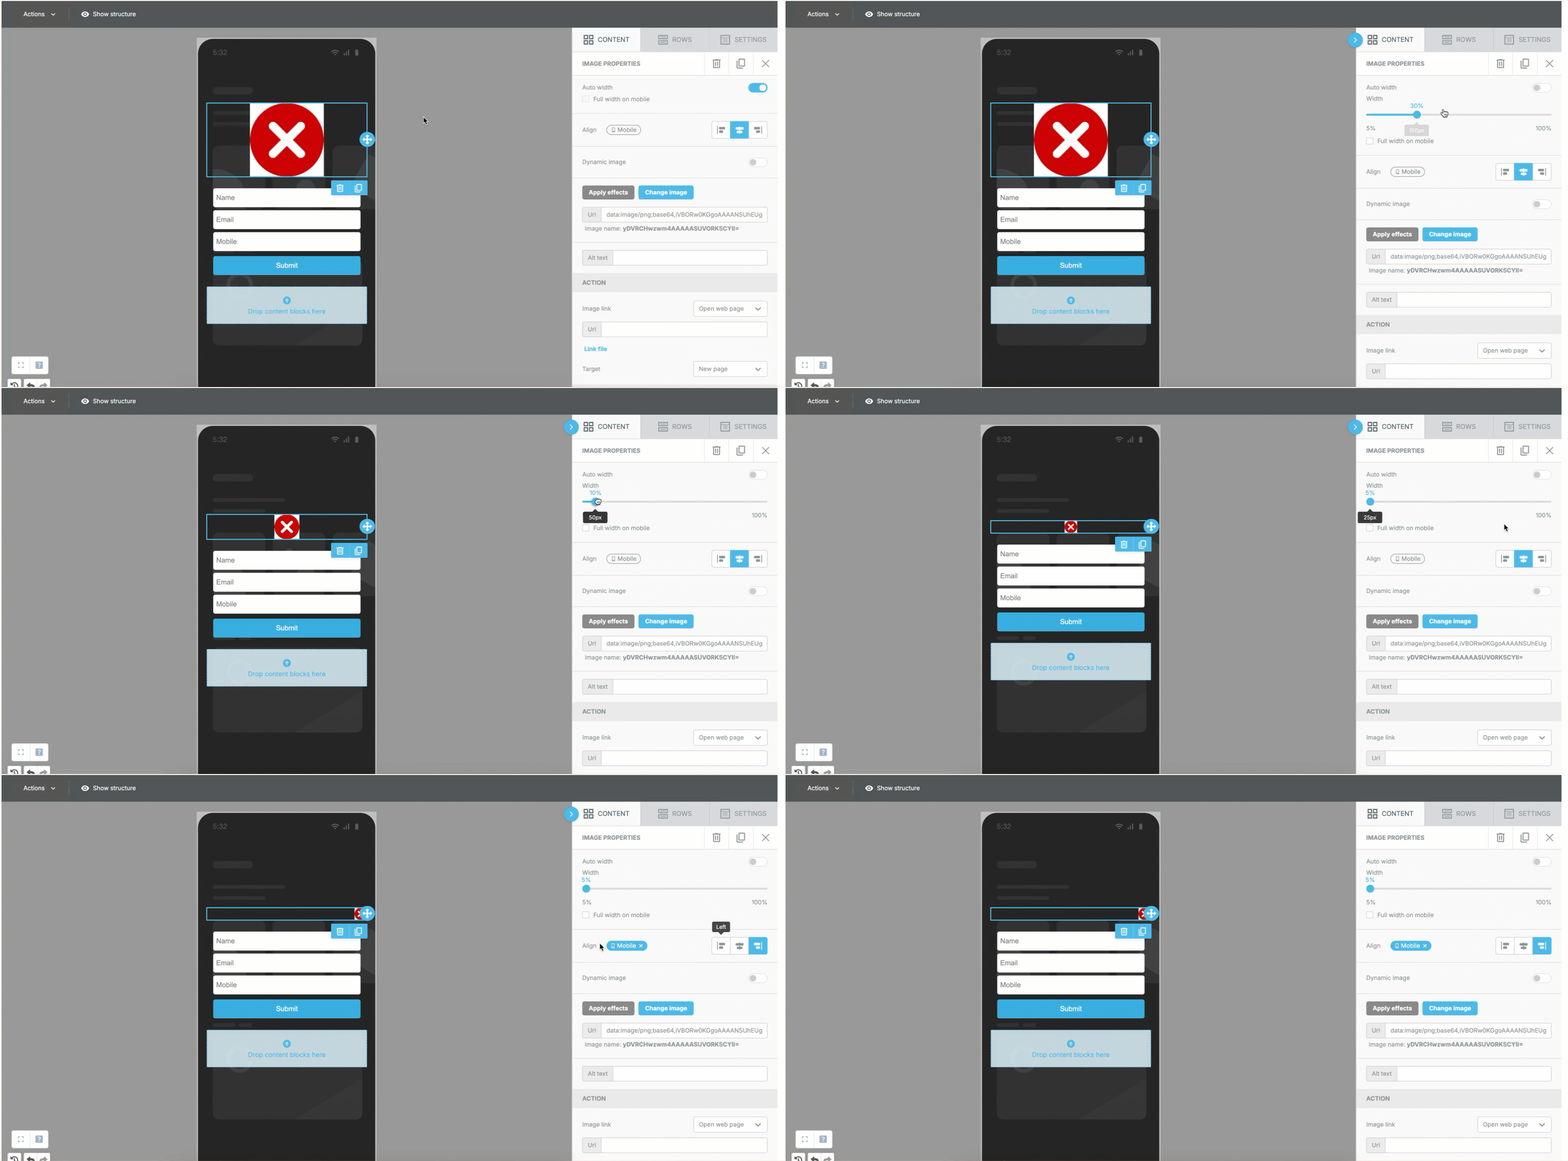 5. Under the **ATTRIBUTES** section, click **Add new attribute**.
6. Select *class* and set it as *close-btn*.
5. Under the **ATTRIBUTES** section, click **Add new attribute**.
6. Select *class* and set it as *close-btn*.